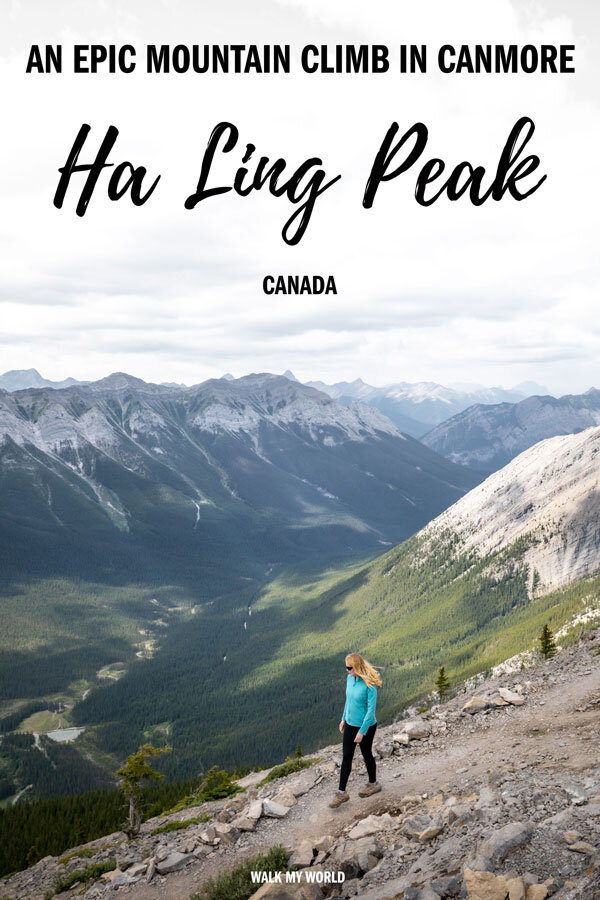
The Ha Ling Peak trail has a bit of reputation: think an incredibly steep hike with a climb to the top which used to be a scree slope. When we asked a local what it used to be like she simply described it as “treachorous”! She went on to say that if you managed to even make it up to the top (it was a one step back for every two steps forward kind of hike), then the only way down was to literally slide to the bottom of the scree slope!
That’s all changed and we happened to be visiting Canmore just days after the Ha Ling Peak trail re-opened after over a year’s closure for trail maintenance. Now the tales of narrow ledges and death defying scrambles have been replaced with a steep, but certainly safer hike following the introduction of new ladders and widened paths. We decided to try out the trail which is a locals favourite but hiked by relatively few tourists.
Here’s how we found the new Ha Ling Peak trail.

Ha Ling Peak Trail
Difficulty: Hard
Distance: 8 km return
Elevation: 700 metres
Time taken: 1 hour 50 up, 1 hour down
Start point: Goat Creek Car Park
Whilst we took three hours overall as we were meeting family in the afternoon, we recommend giving yourself more time. The views are fantastic and more time to enjoy them would be ideal!
The start of the trail
We’re not going to lie, this is a steep trail. One of the steepest over a very short distance that we’ve ever hiked and it starts as it means to go on. You’ll head straight into the forest and begin ascending on a series of meandering switchbacks.
The trail has different degrees of steepness, but there is next to no flat sections, it is uphill all the way.
The path is in good condition and despite a bit of mud the forest section is not too difficult. You’ll get a few glimpses of the valley in between the trees, but you don’t get the amazing views until you reach the first viewpoint.
The higher you get there are some sections with some loose gravel which can make it slippery but nothing too much to worry about in the forest. Just take your time and you shouldn’t have any problems.
Having not hiked this trail before we don’t know if anything has changed on this section. The first very obvious addition you’ll find is a section with a chain alongside the path and footholds blasted into the rock.
On the way up the rail wasn’t necessary but it was quite nice to have on the way down even though you could manage without.
The footholds make ascending this section easy and it’s not in the least slippery.
Having seen this we thought it was going to be a fairly easy trail to the top but it definitely gets harder.
Not long after the chain fence you’ll start to get your first mountain views through the trees. You’ll also have to traverse a section of path which is quite narrow and full of loose stone and gravel.
I personally thought this looked way dodgier than the section that had the chain fence and wondered why they chose to safe up the section on rock rather than the slippery section with a really steep drop on one side of the trail. 🤔
Read next: The best things to do in Banff for a trip of a lifetime
By now you’re feeling the first couple of kilometres and almost everyone is beginning to slow down and pause for breaks. We heard one group really optimistically say “it’s only a couple of hundred metres to the top”. ***Spoiler Alert*** - you are about half way!
Read next: 10 beautiful Tofino hikes to do on Vancouver Island and The quietest hike in Banff - the Healy Pass hike
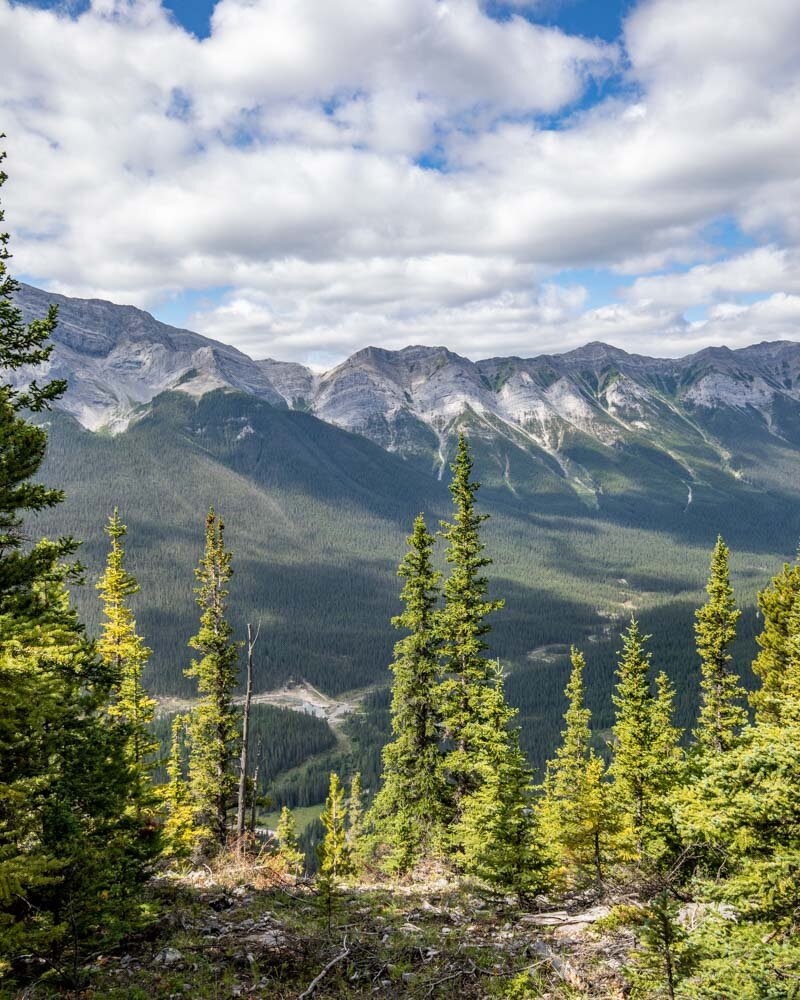
Onto the first viewpoint
The switchbacks become steeper and you’ll have a mixture of dirt path and sections with footholds blasted into the rock again. You’re still in the trees but views become more frequent and stopping to check them out was a great excuse for a breather on the relentlessly steep trail.
Soon you’ll reach the first official lookout point which is beautiful and has lots of large rocks to sit on for the perfect snack break spot.
It was then that I looked up in horror and saw just how far away the peak was from this point! Luckily I can tell you it probably looks further than it is so it is 100% worth pressing on.
Some people turned back at the point, but to be honest the views get much better so it really is worth continuing on unless you really feel you can’t.
Read next: The Sulphur Skyline Trail in Jasper for epic views and Incredible things to do in Lake Louise for a trip of a lifetime
The final push
The trail continues from the lookout on - you guessed it - a steep path and switchbacks. Some of the path is dirt and some my old favourite the loose gravel. Which is ok on the up, but always has me nervous on the descent.
It won’t be long before you reach the first of the three ‘ladders’. What a godsend these are!
I know for sure looking at the almost vertical stony sections underneath them that I couldn’t have made it up without them. Hiking purists will no doubt not be fans of this new introduction, but for your average hiker it has made the trail much more accessible.
I say ‘ladders’ because they aren’t what I would refer to as a ladder but more of a suspended staircase. They are very easy to ascend and descend and so much quicker than the stony path. They were my favourite section of trail and a nice break from the norm.
They are also split in half by a rail allowing for two way traffic which makes them even safer. Even if you don’t like ladders these should be fine because they are more like stairs and not too steep.
Once you’re on these staircases you can already see you’re pretty much at the saddle and the end is in sight.
After the last staircase you will have to traverse around five minutes of loose stony path which is a little slippery (don’t make the mistake of touching the sides of the path for support or you might rain down a load of stones on the people climbing behind you, apologies to whoever was behind me!).
Once you’re at the saddle there is loads of space to sit and have lunch or just admire the views on both sides. This is the end of the hike for the majority of people we saw that day and the end of the maintained trail.

It was incredibly windy at the saddle so I’d definitely recommend having a wind breaker even on a hot day - though it wasn’t hard to find a rock which was sheltered so you could properly relax up there.
You can see the huge mountain range as well as the reservoirs which despite being manmade were actually really beautiful.
You’ll likely see chipmunks hopping through the rocks too, no doubt hoping for scraps (though you shouldn’t feed them). The view was definitely worth the climb and a good reward for the effort.
However if your scrambling skills are up to it you can continue for 200m (40m elevation) up to the tip of the peak itself.
For us this slippery slope was a step too far, it looked ok going up but I didn’t like my chances of descending again without sliding!
Alternatively you could follow the narrow ridge clearly visible on the righthand side to Miners Peak.

The summit of Ha Ling Peak
One local we met always does both peaks and has been doing so for years long before the trail improvement, respect!
Whilst I would have loved to make it to the peak I could tell by looking at it it wasn’t worth the risk with my reputation for clumsy descents!
Read next: Abbott Ridge - hiking on top of the world in BC and Hiking the Parker Ridge Trail - the best walk in the Icefields Parkway
The descent from the saddle
Pretty much the entire way up I felt a mounting sense of dread at the thought of descending the trail.
Loose sections and steep drop offs on narrow ledges are not my thing.
I started briefly with poles and then found that the best and safest way for me was just to run down. So I did, the whole way, and it actually wasn’t too bad at all.
Using the poles I was walking too slowly and actually making it harder but running was surprisingly easy and actually made for a great descent on all but the steepest section of loose stones where I defaulted back to poles and a snails pace!
We got back to the bottom of the trail in an hour feeling tired but satisfied. Our first decent climb in a while under our belts and ready to take on lots more of the Rockies.
Read next: Our favourite Revelstoke Hikes, British Columbia and The Via Ferrata Banff - should you take it on?
Essential info about Ha Ling Peak
So overall how difficult is the Ha Ling Peak Trail?
Overall I’d say that the steepness of the trail almost throughout makes it a difficult trail. The few loose slippery sections can be tricky but the hike is not technical and the trail improvements have made it accessible to most hikers.
If you can hike uphill steadily for an hour and a half to two hours and don’t mind the odd narrow section then you will be fine.
Best time to hike the Ha Ling Peak trail
We hiked on a weekend just after opening and the trail was hugely busy. It was mainly locals hiking, so if you go on a weekday or very early morning on a weekend it would be much quieter.
We think that lots of people were keen to check out the trail following the improvements so it will likely get less busy the longer that it goes from the re-opening date.
In terms of season we hiked in summer and there was no snow at all on the trail. Early on in the season there could well be lingering snow and sections of the track pose an avalanche risk (these sections are marked with clear signs telling you not to stop).
Read next: The Stanley Glacier Trail - a short hike near Banff
Facilities at the Ha Ling Peak Trail
The car park is shared with the East End of Rundle trail and is not that big so it does fill quickly. You can park along the road though which is what we did.
There are pit toilets at the car park.
Bear safety at the Ha Ling Peak Trail
Though we hadn’t heard of any reports of bear sightings on the Ha Ling Peak trail it is bear country and you might want to carry bear spray with you.
Bears are usually shy but don’t like to be surprised so make noise around any blind corners.
Read more: The Mount Edith Cavell Hike for a truly memorable hike in Jasper
Getting to the Ha Ling Peak Trail
The Ha Ling Peak Trail starts from the Goat’s Creek Parking Lot. This is a 25 minute drive from the centre of Canmore and about 40 minutes from Banff.
A large portion of the road is unsealed (dirt road) but most cars should be fine as the road is well graded - there are no corrugations or any rough terrain.
This post may contain affiliate links, meaning at no additional cost to you, that we will earn a small commission if you click through and decide to make a purchase.
This helps towards the costs of running our website. :-)
Like it? Pin it!
Follow us on social media
Are you planning on hiking in the Banff/Canmore area? Would you take on the Ha Ling Peak Trail? Let us know in the comments below!