The Upper Yosemite Falls hike is one of the most popular in the park, which is surprising as it’s also one of the most unforgiving and tiring! It’s a natural stair-master, climbing 3,000ft across 3.5 miles. If you want to push yourself and get some incredible views, this is the hike in the valley to head for.
The Upper Yosemite Falls track rewards you with staggering views along the way to keep your motivation up.
Here’s everything you need to know about taking on the Upper Yosemite Falls track.

Hiking the Upper Yosemite Falls Track
Upper Yosemite Falls hike stats
Diffculty: Hard
Distance: 7 miles or 8.8 miles to Yosemite Point
Elevation: 3000ft
Time needed: 4-6 hours
Trailhead: Camp 4
What to expect in brief
- A hard, uphill hike for the whole trail
- Some of the best views of the Yosemite Valley floor and Yosemite Falls
- A tiring, but achievable challenge
- Hiking poles will make the downhill more bearable
The beginning of the trail
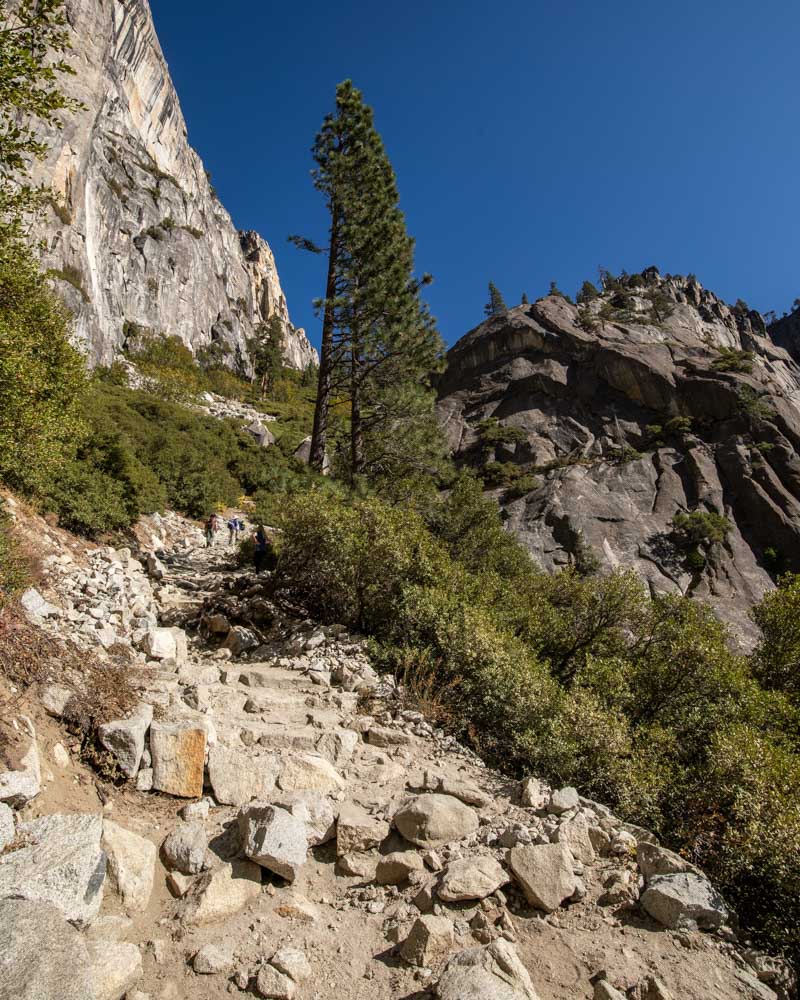
The trail starts as it means to go on - by heading uphill. Sparing a short downhill delight and a couple of tiny flat sections, this is what you’ll be facing for the next two hours!
The first section isn’t the hardest, but it’s still a full-on introduction as to what’s to come, as you make your way upwards on a relatively slippery path.


The switchbacks in the forest are fairly shallow (in the context of what’s to come) and the trees offer some shade, which you won’t get further along the trail. For this reason it’s a good idea to start early in the morning so you avoid the worst of the heat and intense sun. We met a few people who hiked the trail at midday the day before and nearly collapsed from heat exhaustion!
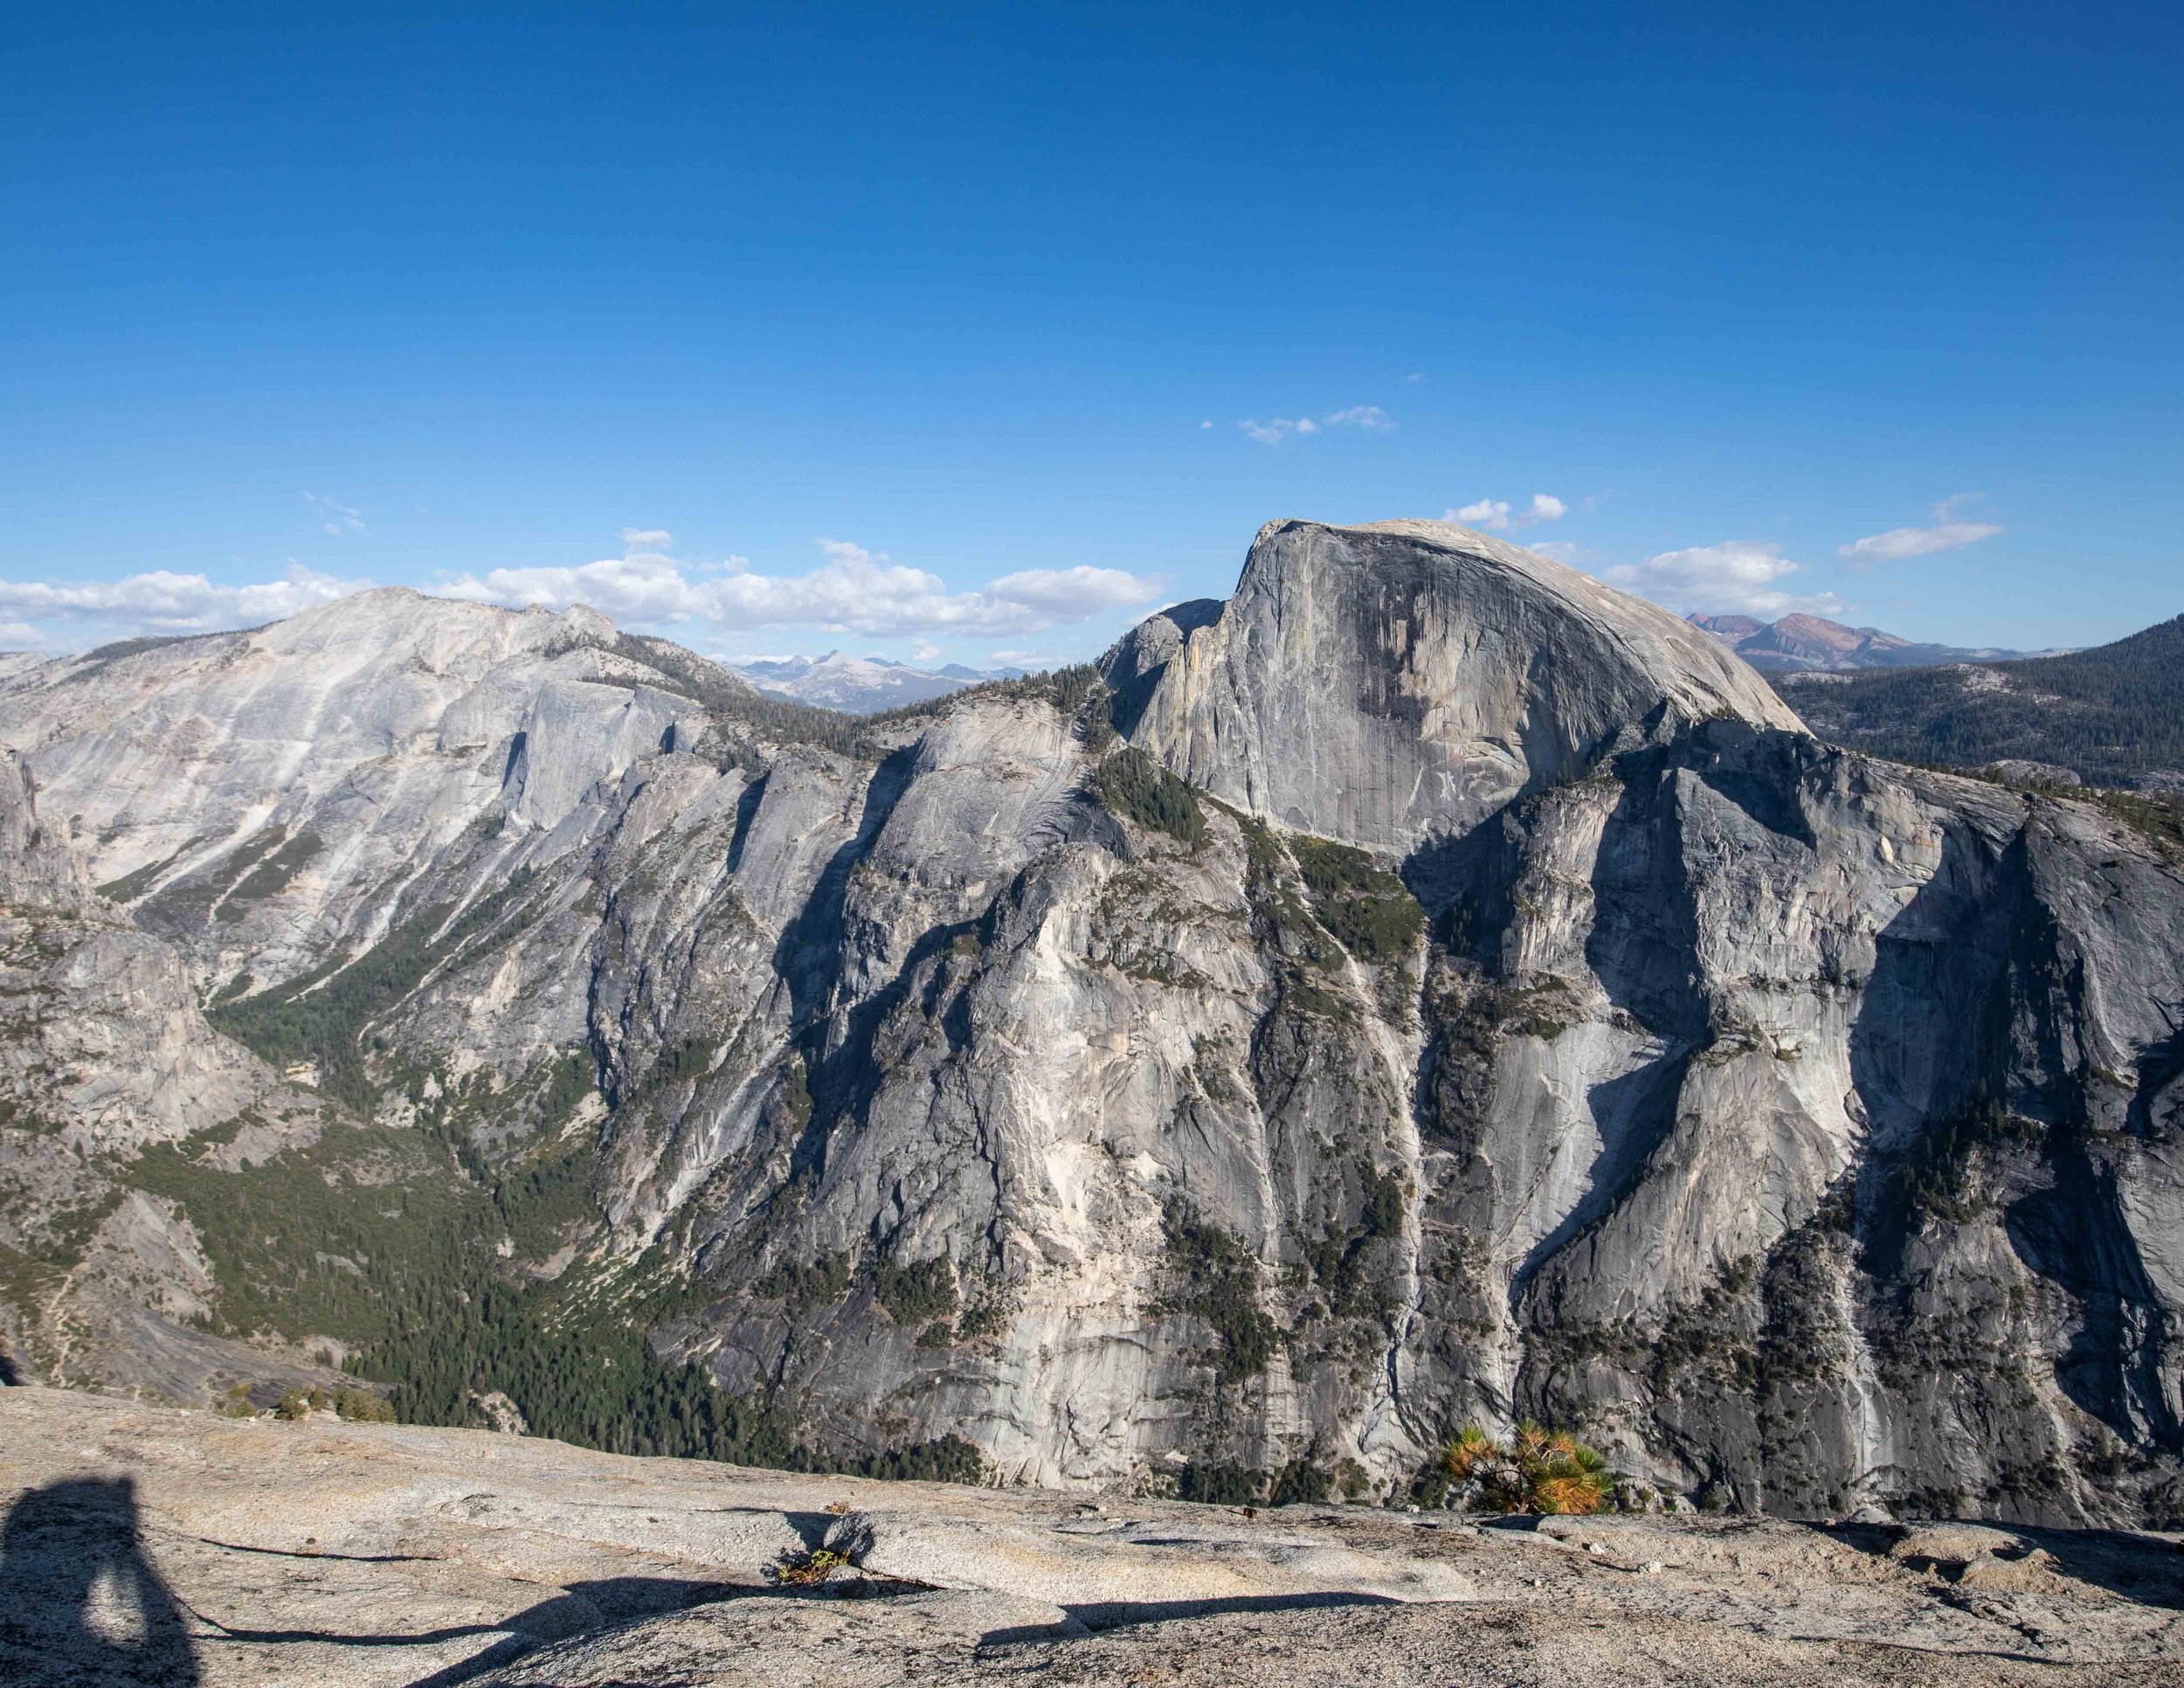
The good news is it won’t be too long before you get to the railed lookout at Columbia Rock, which offers your first truly open view of the valley including Half Dome and the falls. It’s spectacular.
The trail continues to wind uphill with a few more incredible views of the valley and Half Dome (you can see the view of Half Dome at the start of this post).

The view from Columbia Rock, insert falls here!
In the morning there seemed to be a mist on the valley floor which looked really dramatic. Then we realised it was smoke from the hundreds of morning campfires from the valley campgrounds!
The trail heads up a little further before starting the traverse. This is a good place to catch your breath as you enjoy an all too brief downhill section (a debt you’ll have to pay on the way back!). Then you’ll turn a corner and see the foot of the falls.

Or you will if you’re here any other time than the fall! When we visited it was bone dry, which is just another reason we’ll have to come back one day! If you want to see the falls at their fullest the best time to come is spring.
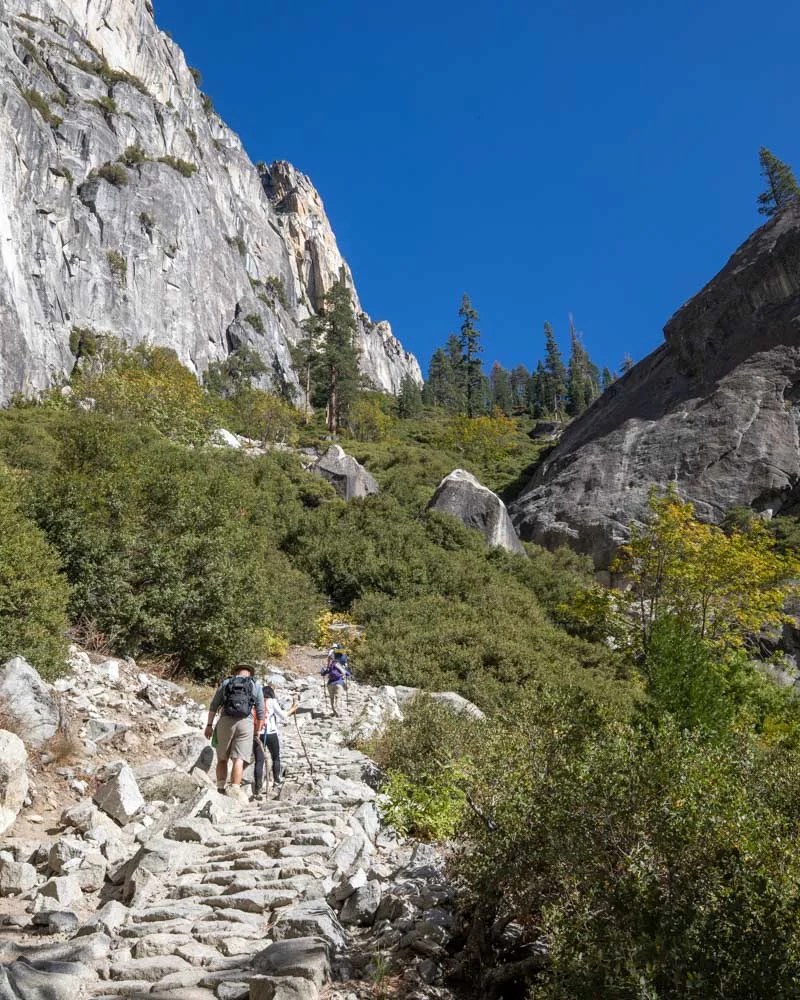
The second section - the hardest part
This marks the beginning of the hardest part: the trail gets a lot steeper and is completely exposed. This makes for great views, but also means you feel the full intensity of the sun. The path is mainly cobblestoned with a fine layer of sand dusting the top. We’ll be honest, it’s a slog.
Take it slow and just keep going as there are a lot of false summits. It seemed like everyone was having a breather every 10 minutes, but it’s not too bad when you have scenery like this! After about an hour, you’ll have made it to the top of the path and will hit a junction.
Continue straight on and slightly right for the final 0.2 miles to the viewpoint. The trail on your left leads to Eagle Peak and the mighty El Capitan.
We carried on to El Cap and would recommend it if you are in the mood for a long day as the whole trail including Eagle Peak clocks in at just under 20 miles! If it helps, by the junction you’ve already done the most steep part of the hike.
From the final view point on the Upper Yosemite Falls track you’ll get an epic view above the falls, again don’t come in Autumn! The trail to the viewpoint is quite narrow and exposed but there is a rail to hold on to. Vertigo sufferers might want to skip this bit.
If you’ve got more energy you can choose to carry on to Yosemite Point which is supposed to be very worthwhile but we opted for El Cap instead. If you do choose to carry on it’s 0.8 miles further and an extra 700ft of climbing.
Hiking down - a time to be careful
Hiking down the Upper Yosemite Falls hike is the most stressful part of this whole hike, and certainly takes a toll on your body. The main reason for this is because the path is incredibly slippery.
Years of hikers going up and down has covered the smooth stone steps with sand and dirt, making it feel like you’re walking across a floor of marbles. You’ll feel your feet sliding every few metres for nearly four miles!

This seemed to effect everyone, even the people who were fast on the way up slowed down dramatically on the way down. Hiking poles are definitely recommended for this section to save your knees and give you a better chance of not going over!
It wasn’t fun going down but there’s no doubt we felt a great sense of achievement at the bottom!
Essential info about the Upper Yosemite Falls Hike
Upper Yosemite Falls Difficulty
The Upper Yosemite Falls hike is certainly one of the most strenuous hikes in the park. Whilst it is only 7 miles long, it is a very slow and steep 7 miles! Mile for mile, the Upper Yosemite Falls hike is one of the hardest in the park.
Upper Yosemite Falls Elevation
The elevation for the Upper Yosemite Falls track is 3000 feet. This may not seem too bad until you realise that this is packed into just 3.5 miles! Then you have to go down as well which poses its own challenges.
Hike time
Give yourself 4-6 hours to complete this trail, allow time for a breather and bring plenty of water and food. Ideally, you don’t want to be hiking (sliding) down this trail in the dark.
Trailhead
Don’t make the same mistake we did! The trail does not start at the Lower Yosemite Falls, but Camp 4 - which is about one mile away. There’s a car park at Camp 4 for day users (the campsite car park is only for campers).
Yosemite Entrance Fee
You can use the America the Beautiful Annual National Parks Pass to get into Yosemite (US80 per annum for US citizens and residents, $250 for foreigners). Otherwise it will cost $35 for entry with a car, $30 for a motorbike or $20 per person on foot or bike for 7 days.
Where to stay in Yosemite
If you’re lucky enough to book in time, the best place to stay is in Yosemite Valley itself. The trail starts at Camp 4 so staying there is ideal but it’s very hard to get in, here’s our guide to camping in the park.
Packing suggestions for Upper Yosemite Falls
Having the right gear can make a huge difference. Here’s what we pack and have relied upon for years:
Sunscreen: This trail has very little shade and the sun is brutal most of the year! Check for sunscreen on Amazon or REI
Day Pack: Osprey Talon 22 (we’ve owned this for years). Check on Amazon, REI or direct with Osprey
Hiking Boots: Merrell Moab (for men and women). We’ve both used these for over three years and they just keep going. Check them out on REI or Amazon
Trekking poles: This is essential for the hike down, which is incredibly slippery. We’ve used Black Diamond for years as they are light, solid and durable. Check out REI or Amazon.
Reusable water bottle: To avoid single-use plastic. Check then out on REI or Amazon
Icebreaker Base Layer: What we always wear in the winter and makes a huge difference for keeping warm. Check out on REI or Amazon
Looking for more Yosemite inspiration?
Well, luckily we've created tons of articles all about this incredible park. You can head to our California travel guide, or have a look at the posts below:
Hikes
- The 16 best Yosemite hikes
- Sentinel Dome - Yosemite's best kept secret
- What to expect when hiking up the legendary Half Dome trail
- One of Yosemite's quietest trails - North Dome
- One of Yosemite's best - the Clouds Rest Hike
- A hidden gem in Tuolomne - Lembert Dome
Other guides
- A complete guide to Camping in Yosemite
- An epic One Day itinerary for Yosemite
- A hiker's Two day itinerary for Yosemite
- The best places for Sunset in Yosemite
- Our favourite photography spots in Yosemite
Like it? Pin it!

Follow us on social media
Are you planning a trip to Yosemite? Would you take on the Upper Yosemite Falls Track? Let us know in the comments below!