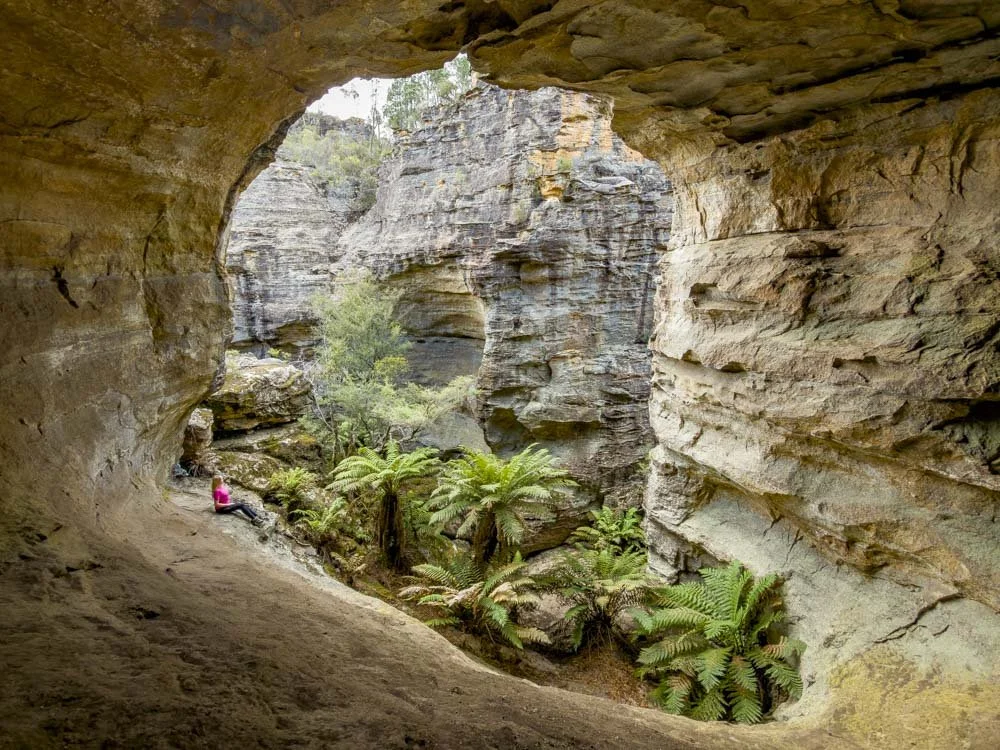
River Caves Canyon is a breathtaking canyon tucked away down an unmarked trail in Wollemi National Park. It feels like entering a secret world - part cave, part canyon. As you walk between darkness and light, you’ll be in awe of the swirling rock formations that make up the top of the towering canyon walls.
There’s something about the sense of wonder that comes from wandering through canyons, and normally that feeling is reserved solely for abseilers, but not at River Caves. This is a spectacular and easy walk in canyon, yet it still has that ‘into the wilds’ feeling.
There are no signposts, either to the car park, or to the canyon itself, but we have you covered on exactly how to get there in this post.
Here’s everything you need to know about visiting River Caves Canyon.

Canyon Safety
Before we get started, this is a remote area with no phone signal. Whilst the walk is not difficult, it’s best to let someone know where you’re going just in case. Take all the usual precautions and bush-walking advice for a wilderness walk. After you leave the Glow Worm Tunnel Road there are very few, if any, cars around.
Never enter the canyon if rain is forecast, or following very heavy rainfall due to the risk of flash flooding.
We recommend taking a PLB with you in case of an emergency. We carry a GME and you can check this one out and many more on Amazon.
There are no facilities whatsoever anywhere near this canyon. Please take all rubbish home with you.

River Caves Canyon
The stats
Distance: 1.9km each way
Elevation: 125m
Difficulty: Easy - moderate
Trailhead: Natural Bridge Car Park
Summary: River Caves Canyon is a bit of a rarity in that you don’t have to abseil or swim. It is a walk in canyon with water that is chest height in one place (which can be avoided) and otherwise knee height at most.
If you know where you’re going, the walk to River Caves Canyon is relatively short and quite easy. We recommend allowing 30-45 minutes each way to get to the canyon, and then plenty of extra time to enjoy exploring inside the canyon itself.
The walk to the canyon is downhill at first, before it flattens as you follow the creek. There is some loose soil on the descent which can be slippery. The creek section is quite overgrown at upper body level, but is ok at foot level, so you can see where you are going, it’s just a bit scratchy.
Inside the canyon you’ll be walking over rocky ground, mainly through shallow water. To avoid the deeper water involves a trickier scramble, but this is not mandatory.
To make it easier to find the canyon, we have the GPS coordinates for the canyon entrance: -33.316119, 150.303661 or you can click here to see it on Google Maps. If you use a GPS tracker, or download this area as an offline map on Google Maps, that will help you find it easily.
Starting the trail
The trail begins beyond the locked gate, passing the ‘Wollemi Wilderness Walkers Only’ sign.
It is approximately 1.4km between the car park and the canyon entrance, but - like the drive in - it isn’t signposted or obvious!

You’ll begin by descending gently on a rocky trail for 315m before reaching the saddle, Natural Bridge.
The path down to the canyon lies to the left, the path is obvious, but for extra reassurance the GPS co-ordinates for the exact location are -33.3225815, 150.3091589 (or click here to see if on Google Maps).
The path is less narrow than it used to be, as is the whole track down to the creek, so once you’ve made this left turn you will have no trouble navigating the majority of the route.

The fire trail down to Natural Bridge

The small trail off Natural Bridge
Into the bush
From the turning at Natural Bridge you need to keep following the path and avoid the temptation to take any turns for the next 1.1km (or close to!). You will eventually end up at Budgary Creek and the entrance to River Caves Canyon.
The path descends immediately and it’s fairly rocky, with some patches of loose soil.

Not terrible, but slippery in parts, especially if it’s been very dry. The gradient slackens after around 300m. There are a few trees down over the track, but none are difficult to climb over.
Soon you’ll pass by a series of pagodas and you know you’re coming into canyon territory! Before this point, you’d honestly have no idea!

After around 745m (from the car park) you’ll arrive in a dried up sandy gully. There are bits of debris here and there, but again always easy to manoeuvre around.
Around 100m beyond this is when the path will begin to get quite overgrown. This is not at foot level, so it’s still easy to follow, but you will find it’s a bit scratchy!
It’s now intermittently overgrown all the way to the entrance of the canyon.

At just over 1.1km into the track, you’ll reach a wetter part of the creek. The old track was just above the water, but it’s heavily eroded.
Unless there’s been a lot of recent rainfall, you won’t get wet boots here, but even if you did it wouldn’t matter as you can’t stay dry once you reach the canyon.

Keep following the path for another 300m and you will arrive at Budgary Creek. This is where you begin heading left. The coordinates for the canyon entrance are: -33.316119, 150.303661

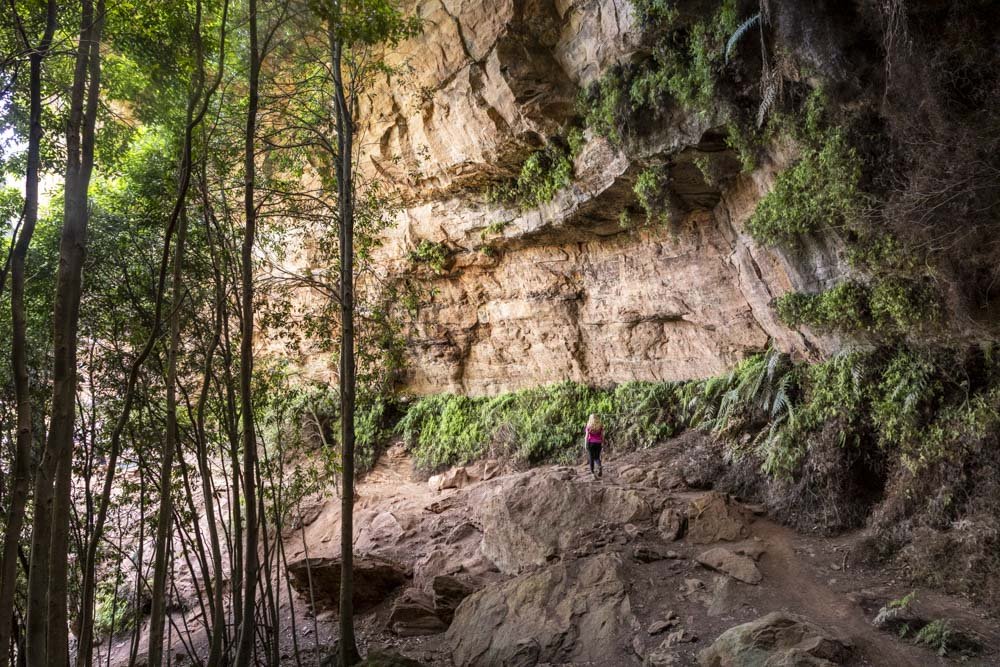
After 50m you will reach the water and see the huge canyon walls which are lined with giant ferns on both sides. The creek flows through the sandy wash. It’s pretty dramatic and you’ll know immediately you’re going to be in for a treat.


Into the canyon
The path into the canyon skirts the left edge of the cliff and then drops you down at the entrance. You can walk through the river (something you will eventually have to do anyway) or criss-cross the creek at first.

Near the beginning there is one large rock to climb up, but there is a foothold and no exposure, so it’s quite easy. However, if it’s a bit sandy and wet it can become slippery which makes it a bit tricker.

At first the canyon is relatively wide and full of foliage, and to be honest even that is extremely beautiful, but the best is yet to come.
Once you’ve walked from the sandy bank down into the canyon you will begin walking in the water at the start of the first narrow slot (this about 100m in).
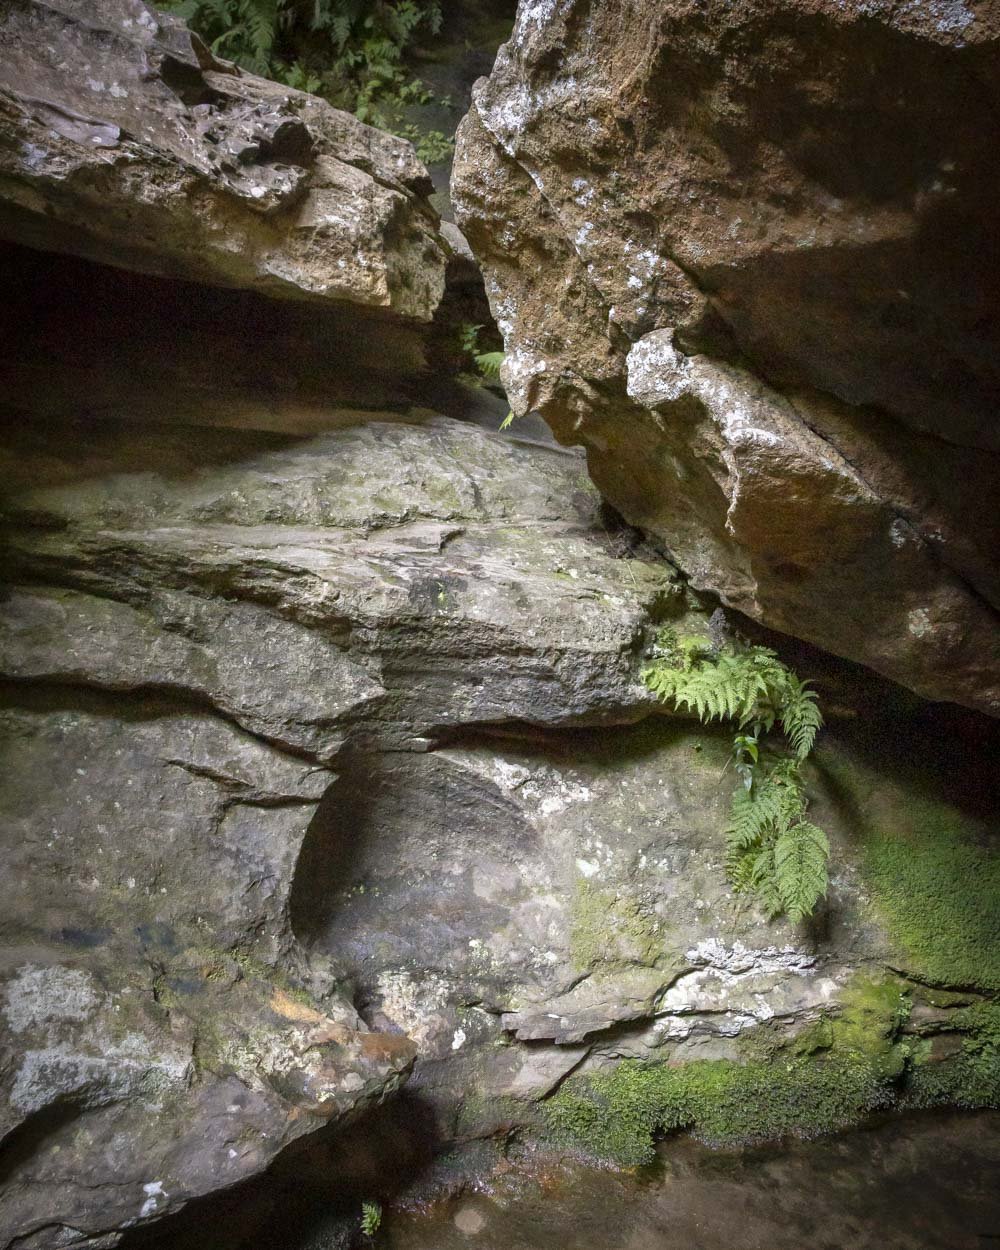
The canyon walls loom over you and they are tall enough to actually make it feel quite dark! Make sure you look up to the very top where you will see those gorgeous swirling patterns.

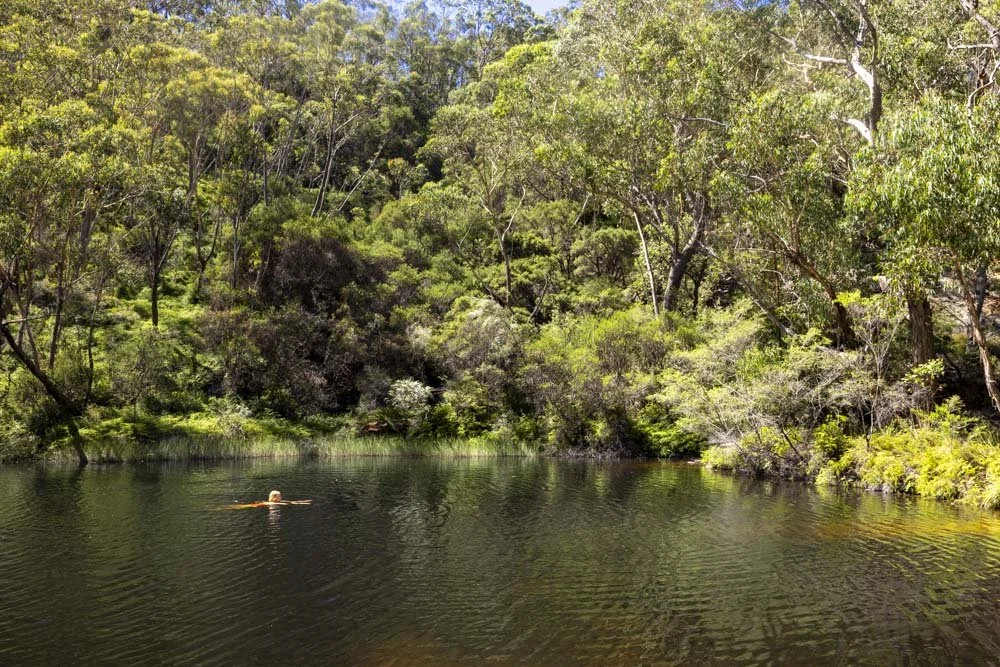
The water is shallow at first, only up to your ankles unless there has been significant rainfall. It’s pretty cold, but even walking just before winter as we did on our first visit wasn’t too much of a problem.
If you’re visiting in cool weather and are worried about it, wear neoprene socks, they saved us on the Narrows hike in Zion.

Inside the slot it really is magical with real wow factor. You’re also very likely to have it all to yourself, which is yet another reason this place is so special.
It’s very easy walking, we’ve been in quite a few water filled canyons and often there are slippery rocks to contend with, in River Caves there is quite a lot of sand and the rocks generally aren’t slippery.


After 60m you’ll appear at an opening with plenty of trees and ferns which has more of a cave like feeling, before you head into another dark section.

The dry route or wet route!
At the second opening you have a choice - continue through the creek (which has one short section which is waist/chest high water) or climb up the rocks to stay dry.
The dry route is a little bit of a scramble, nothing too tricky, but it can be a little slippery if wet, however, if you are ok with the water temperature, then the wet route is more fun.

The dry route
From the opening, look for the route up the right hand wall. It’s behind a big boulder, and there are a couple of footholds. It’s a proper path once you’ve climbed up the wall.
The dry route isn’t the most picturesque option, but if it’s freezing cold it will save you a nasty shock! There are a few rocks to navigate once you’re past the scramble, but it’s not difficult.

You’ll pass a couple more opportunities to jump back into the creek and avoid the deepest parts. Alternatively, you can keep going until the second constriction in the canyon.

The wet route
The start of the wet route is one of the deeper parts. The waist height water is just before you head under the narrow arch with the boulder in the middle. The second time we visited River Caves it was much deeper, as high as chest height.
In summer this would be a delight and even in the cold weather it’s only a short section, so it’s manageable if you’re not too cold water averse.


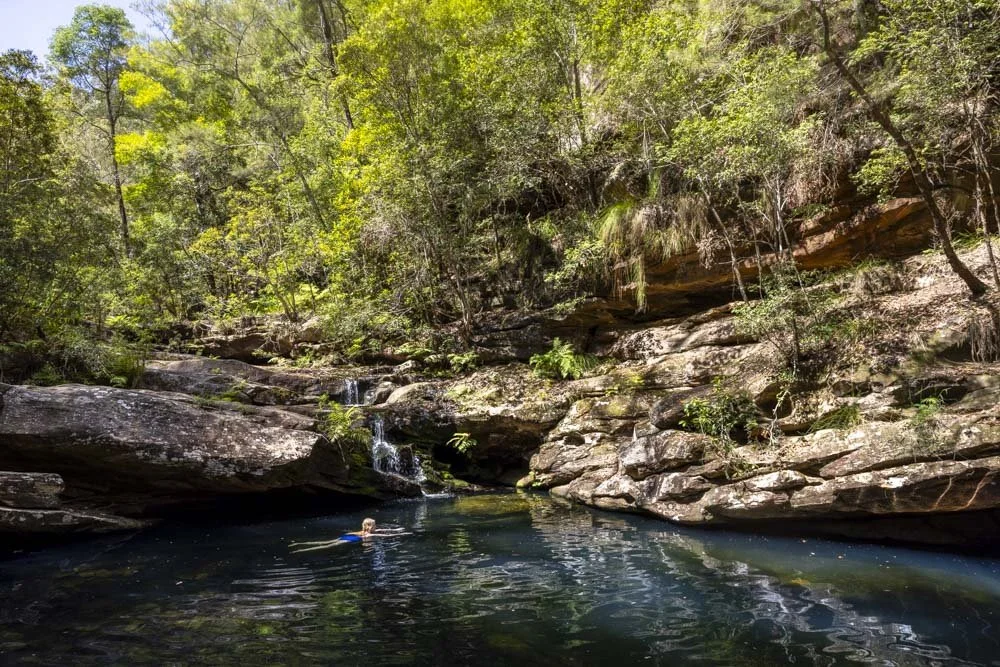
If you choose to pass under the arch (which I recommend!) then you will come out at the base of some pretty cascades.
You can then walk up the cascades which isn’t hard as the force of the water is not strong and continue on through another dark and mysterious constriction.

The second constriction
After 250m walking through the canyon you’ll reach the second amazing slot. It’s another fabulous place where it’s almost completely dark with just a narrow shaft of light breaking through.
That is unless you go around midday when there is more light inside the canyon - something we were aiming for second time around, but were foiled by Easter holiday traffic!

The water level is back to ankle deep and the easy walking allows you to fully appreciate those phenomenal canyon walls. All too soon (50m) you will see the walls open up again and you are standing at the end of the canyon. I really didn’t want it to end!


Your choice now is whether to return the way you came, or to take the obvious path on the left and follow that up and out of the canyon.

We always opt for returning the way we came because who wouldn’t want to walk through the canyon all over again? The views all feel different on the way back and it’s your last chance to soak them up before returning along the bush track.
We haven’t done the circuit route, but personally, I would recommend going back through the canyon again, it is over all too quickly on the way and as you’ve probably driven pretty far to get here you may as well make the most of it!

Making your way back
Heading back through the canyon is no more difficult in reverse. Once you reach the bush track you do have a small hill to climb, but it’s not long before you reach the top.
If you love River Caves Canyon, and are looking for another walk in canyon nearby, we’d highly recommend checking out the gorgeous Dry Canyon, located off Glow Worm Tunnel Road.
Conditions on the drive to River Caves Canyon
Getting to the car parking area for River Caves Canyon requires driving for approximately 26km along dirt trails. At time of writing it is suitable for any cars (in dry weather), however, it does have some bumpy sections, small stones and one steepish hill.
It’s also worth noting that after heavy rain the roads could become waterlogged and impassable for most cars.
Obviously conditions could change over time, but that’s the state of play at time of writing.

Driving directions to River Caves Canyon
Step-by-step directions
If you’re driving from Sydney, turn right onto the Old Bells Line of Road, off the Chifley Road/Bells Line of Road (B59) at Clarence. Take note of the kilometres from here as it will really help! Follow this road until you reach a T Junction - this is Glow Worm Tunnel Road. Take a right.
Keep following this road past the Bungleboori Picnic Area and the turn off to the Maiyingu Marragu Trail, and at the 20.4km mark from the start of these directions, you will see a road signposted as ‘Deep Pass Trail’. Turn down this road. Continue for 600m and take the second left for the Mount Cameron Trail (unsignposted).
If you see a turning signed “West Boundary Trail” you’ve gone too far. Turn around and take the previous turning.
Follow the Mount Cameron Trail for 3km and take the left fork at the junction. This will take you all the way to the Natural Bridge Car Park.
Google Maps Hack
If you’ve ever tried finding the way to River Caves Canyon on Google Maps, you’ll find that errors come up. For some reason, the first part of the Mount Cameron trail is down as a hiking only trail…..

We recommend using Google Maps as a back-up, but make sure you follow the instructions above for a much smoother ride. Here’s how to use Google Maps to help you.
Download the area around Natural Bridge and Newnes Plateau as an offline map. This will help you when you lose signal.
Firstly put these co-ordinates as your destination - 33°21'07.4"S 150°15'40.0"E - you can click here to see the location. Once you reach this spot from Glow Worm Tunnel Road you will see a fire trail on the left. Take this before you reach the fork.
At the fork, stop and put in Natural Bridge Car Park. Google Maps will now be able to take you there from this point.
This post may contain affiliate links, meaning at no additional cost to you, that we will earn a small commission if you click through and decide to make a purchase. This helps towards the costs of running our website. Thanks for your support.