

The hike to the top of Mount Solitary is one of the most rewarding day walks in the Blue Mountains, especially when combined with the short detour to Ruined Castle. Although lots of the walk is on well formed track, there is a fairly long scramble to reach the summit, which makes it feel like a bit of an adventure.
Much of the walk is spent in the forest, but the views at various points along the way are sensational, and the long forest stretches are both gorgeous and relaxing.
It’s a relatively difficult walk due to the length and the nature of the final ascent, but once you get to the top, there is a definite sense of achievement.
Here’s exactly what to expect on the walk to Mount Solitary.

The Mount Solitary hike
The stats
Distance: 15km (17.3km with side trails)
Elevation: 930m
Difficulty: Hard
Time: Around 6 hours, but allow more for stops

The routes to Mount Solitary
There are a couple of ways you can do the Mount Solitary hike, including the 34km loop via the Kedumba River which is usually done as an overnight walk.
We wanted to do Mount Solitary as a day hike so used the route from the Golden Staircase. It’s the quickest route and the one we’ll be describing in the notes below.
As a day hike it’s still a long walk with a considerable amount of elevatIon gain across the course of the walk.
The last 1.1km is on an unmaintained path which is not signposted. Depending on which route you take this is either quite easy scrambling or a little hairy (more on the descent than the ascent).
There are no technical moves required or any one part that feels difficult, but the accumulation of the prolonged scrambling can make it feel quite tiring.

If you’re not used to scrambling, then we are going to go into full details in the track notes below to help you decide if it’s right for you. Also feel free to ask any specific questions in the comments below and we will do our best to help.
There is no reliable water source along this trail and it’s a long walk, so bring more than you think you will need. Same goes for time, we thought we would be quicker than we were and ended up finishing in the twilight, this doesn’t worry us because we often do night hikes, but it’s something to bear in mind.

Starting the trail: descending the Golden Staircase
In a bid to keep this post from becoming monstrously long, we’ll cover the section to Ruined Castle quite briefly. if you do want more detail, we have a more indepth guide to Ruined Castle here.
The Golden Staircase is 1km from top to bottom. It begins on a more natural dirt path with some rocks and tree roots to climb over, before reaching metal and wooden staircases.


It is steep in parts, but there are handrails so it doesn’t feel dodgy in any way. It doesn’t take long before you’re at the bottom and meet with the Federal Pass.
Both Mount Solitary and Ruined Castle are signposted and you head right to reach them.

Strolling along the Federal Pass
The next 2.7km are a breeze. The Federal Pass is both flat and very well maintained. You barely need to look at your feet and can instead fully soak up the gorgeous forest.
We have walked this section quite a few times and seen lyrebirds every single time.

It makes what is already a beautiful forest to walk through, even more special. You have the odd glimpse through the trees to the mountains, and can even see the Three Sisters at one point, but really it’s all about the beauty of the trees.
There have been several landslides along this part of the walk, but all are easy to negotiate and the only one that could have been even slightly tricky has footholds cut into it, making it straightforward.


After 2.7km you reach a toilet and the junction for Mount Solitary and the Ruined Castle.
Climbing up to the Ruined Castle - optional detour
From the junction, you can either begin making your way towards Mount Solitary directly or first go via Ruined Castle. If you’ve never seen Ruined Castle before and you are doing ok for time we’d highly recommend the detour.
It doesn’t actually involve much extra in the way of distance, but it does add on some extra climbing and one slippery descent.

The view from the top of the Ruined Castle
If you skip the Ruined Castle
If you don’t want to go to Ruined Castle you head left at the junction and follow the well maintained and mainly flat path past the Ruined Castle campground.


You’ll continue following the obvious path, past a turn off on your right which heads uphill towards Ruined Castle. This is where you would come down from the castle if you had chosen to visit. It’s roughly 1.2km to the junction and an easy section of track.
Going via the Ruined Castle
If you are planning to visit Ruined Castle, from the signposted junction by the toilet you’ll head right up the wooden staircase. The next 550m are mostly uphill before the path flattens and takes you to the base of the castle.

There is one scramble up between some huge boulders to get on to the castle itself. The views are sensational and there are plenty of giant boulders to sit and relax on.
If you want to get up to the very top of the castle you need to negotiate one more scramble. It’s not difficult, but it’s a little more exposed.


To join the path to Mount Solitary you do not need to retrace your steps to the junction by the toilet. Instead carry on past the base of the castle, along the worn path and begin making your way downhill. For me this was the worst section of the entire walk!
There is roughly 200m of quite steep descent on a path covered in loose soil.


This is my least favourite kind of terrain as I always worry about completely losing my footing! The path continues downhill for a further 200m but it’s less steep and therefore not so hairy.
You will then reach a signposted junction and turn right for Mount Solitary. Although I didn’t like this descent it is a big time saver.

The climb to Mount Solitary begins
From the junction there are 400m of gloriously flat track before the ascending begins. You will be back in the bush for a little while now, which is a nice break from the sun on a hot day. There is one giant mud patch along this stretch (which may dry out) but it’s not horribly deep to squelch through.
The track then begins to head uphill for the next kilometre. There is the odd flat patch, but it’s predominantly uphill on a decent track. Partway along you’ll pass a rustic campsite and then you’ll come to the foot of the scramble.


About the scramble
Although there are one or two arrows on the rocks along the way, for the most part the route to the top of Mount Solitary has no markers. There are usually several options available and some are more difficult that others.
There is one key turn which we missed on the way up, but caught on the way back and took the coordinates for.
I’d highly recommend making sure you make the turn at the coordinates because the other route involved a much steeper scramble on loose soil which had me grabbing for tree roots and would not have been fun going down!
When you hit the ‘right’ ie easiest route up Mount Solitary, no one part felt very difficult, it’s more that it’s a long scramble at 1.1km!

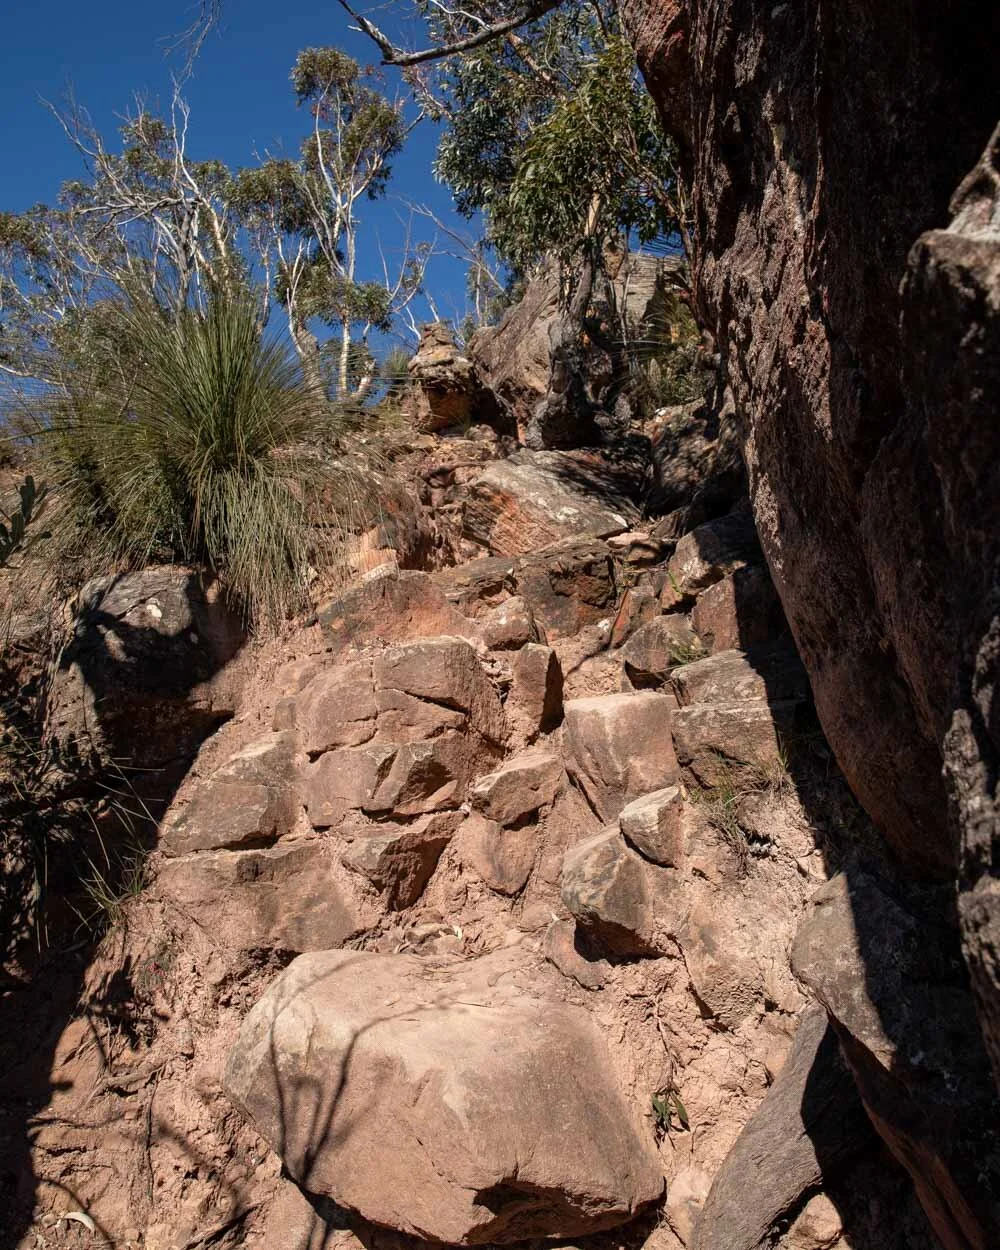
The route up
The first part of the walk up has an arrow scratched in the rock and it’s very straightforward. You can see the arrow and the rocks below.

After finding the start, the key is to stick to the beaten path, and if the trail forks, stay on the right. The northern side of this trail is more exposed and much harder to scramble up than the southern side, until you reach the left turn.
After the initial scramble, you’ll come to a boulder gully you have to climb up, which is the only bit that required straddling a boulder to get up - but there is no exposure. You are wedged between giant rocks so you don’t feel like it is dodgy.
I think most people will probably find it quite fun because you have to think about where to place your feet without feeling like a wrong move will cause you to fall off the mountain!

After this point there are a couple of ways you can go. We recommend keeping to the right (which is all straightforward scrambling) and easy to follow until you come to a junction that is easy to miss.
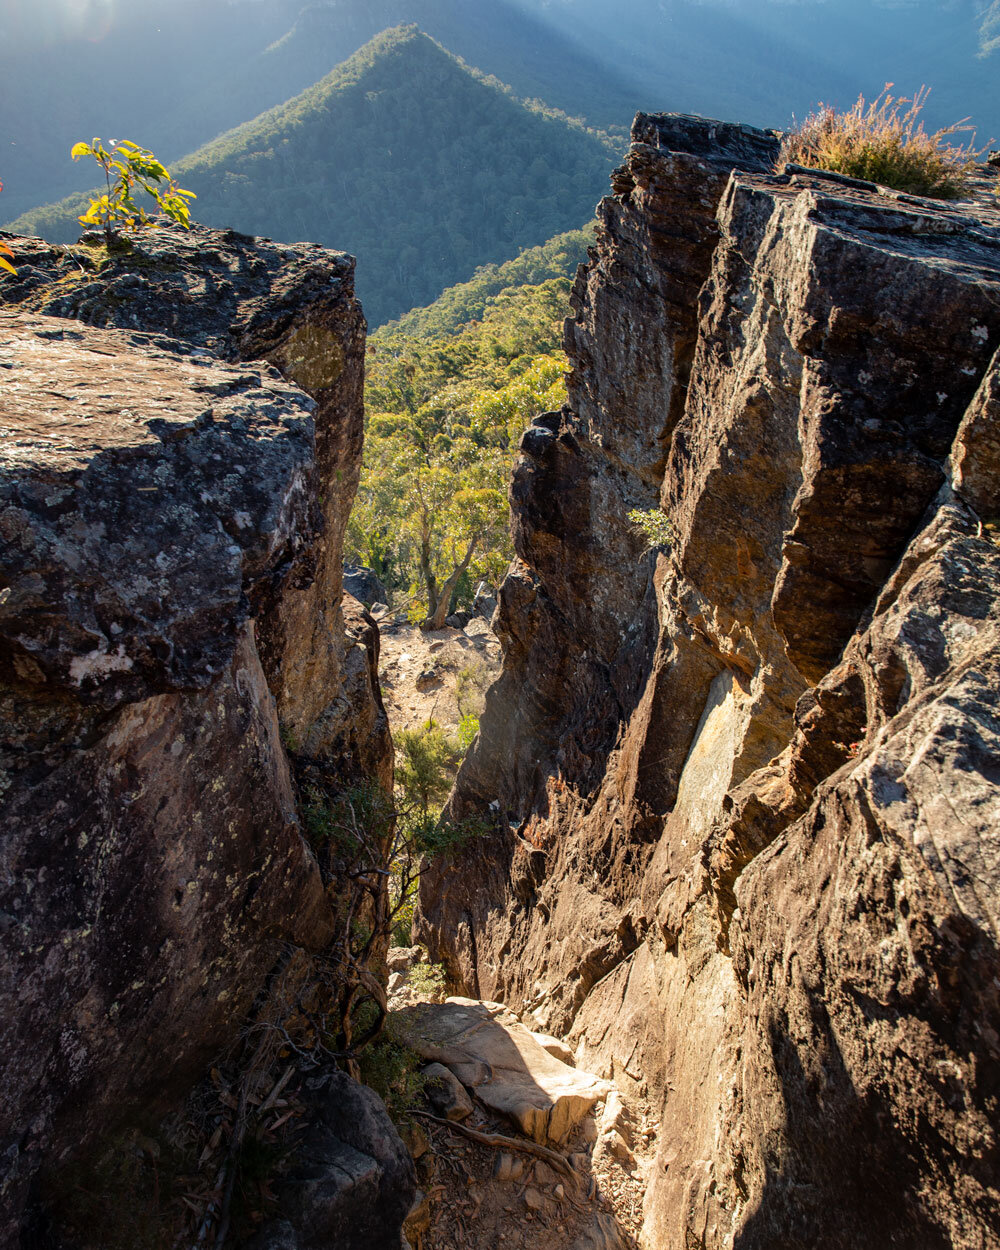
Finding the turn for the easier route
The path heads downhill, and flattens, whilst hugging the right-hand side of the cliff. Keep an eye out for an opening on the left. The coordinates for this junction are -33.7751471, 150.3044831 (you can see the spot on Google Maps by clicking here).
You can see the cairn and path in the photos below, the cairn looks obvious in the photos, but we did miss it on the ascent.


Whilst you can continue along the obvious path on the right, it is much steeper and had a longish stretch of loose soil rather than the grippy rocks.
You’ll still get up this way as you aren’t likely to slip ascending, but it’s significantly harder than the route up the middle.

The slipprery scramble route

The worse route to the top
The middle route continues to have big rocks to climb and there are no sections that are particularly tricky, until you are just below the summit. After 200m you’ll need to look for a gap in the rocks which will take you to the summit.
You have a bit of a squeeze between the middle of giant boulders, which was slightly awkward.

The narrowness meant that footing was a bit tricky but I managed and I am not a very adept scrambler. As with the other awkward bit at the beginning, you are not on a precipice or anything, so there is no pressure to get it right straight away or fear a wrong move will send you plummeting.
After this you are steps away from the summit.

From the summit to Chinamans Gully
Although you do get wonderful views almost all the way up the scramble, the summit itself is not going to blow you away.
As with many other peaks in the mountains, including Mount Banks and Mount Hay the top of Mount Solitary is largely covered in dense bush. Unlike the other two you do get a view in one direction, but it’s not the panorama you might have been hoping for.

For this reason, if you have the time and don’t mind heading downhill (a debt you will have to repay on the way back up again), we recommend heading on to Chinamans Gully. It’s roughly 750m each way to reach the gully, and a little more to reach each viewpoint.
The walk to the gully is flat at first and then heads rather steeply downhill for roughly 400m on a dirt path. You will then be at the campground, which looks like a lovely spot to spend the night.

To the lookouts
The first viewpoint was only a little over 100m from the camping area and was our favourite of the two. You need to head right towards the edge of the bushline and you will see a few rocks to climb up which take you to a fabulous viewpoint. There is a large rocky platform to sit and relax on.

This was our lunch spot and it’s a hard one to beat! You feel really close to the mountains on the left and the view is all mountains, forest and lake as far as the eye can see. It’s a beautiful view which feels far away from the outside world, in a good way!


To get to viewpoint two head back to the campground and start heading to the left. You’ll pass two giant overhangs, which were used as shelters by the Gundungurra people for thousands of years. Sadly there is a bit of graffiti in one of them which is a real shame, but they are still impressive to look at.

Keep following the worn path past the overhangs and you will come to the second viewpoint about 300m later. As you cross the creek it is easy to lose the path and end up bush bashing, no part of the correct trail is a bush bash so if you find yourself in that position backtrack and you will see the right way.
The second lookout is another beautiful view, this time of the mountains in the direction of Katoomba.

The scramble back down
From the second lookout to the start of the scramble back down from the summit is roughly 1.4km. As mentioned some of that is fairly steeply back uphill, but it’s over quite quickly.

The easiest route back down from the summit is to walk directly to the edge of the cliff and take the path down the middle (ignoring the path to the left around 100m before which is marked by red tape on the tree).
The red tape route was the way we climbed up and it is extremely steep with loose soil and there would be a real risk of slipping on the way down.

The route through the middle is much easier. There are big rocks to climb down, but nothing too difficult and nothing that feels like you might slip because it is all on grippy rock. In fact the hardest bit is probably the very first rocks you have to squeeze between because it’s pretty tight!
There is one short section which involves traversing a narrow piece of rock for a couple of steps and was the only bit of the scramble that felt a little bit exposed. But again grippy rock and using your hands for extra security meant it didn’t feel dangerous in any way.
Keep following the path straight and keep left at points where you could go left or right. More often than not you will see both possible routes and automatically know which looks easier.
As long as you get that middle route heading down and not the loose soil route you shouldn’t run into any difficulties.
Then unless you are a champion scrambler, it’s basically slow and steady until you hit the main trail again.

Finishing the route back
Assuming you went to Ruined Castle first you will take a slightly different, and easier route back. From the end of the scramble, until you reach the Ruined Castle campsite is roughly 1.7km of easy bush track. The majority is downhill and flat, with a couple of negligible inclines.
The campsite has a toilet and water tanks (although I am not sure that water is always guaranteed, so don’t rely on it).

From the campsite to the Federal Pass is 600m, you’ll see the turning back onto the Pass on your left when you spot the other toilet, and then you are back on the trail you have already walked.

The next 2.7km is the flat walk along the Federal Pass, which is great for stretching your legs again after the steep descent, before finishing with that 1km climb up the Golden Staircase.
We were quite tired by the stairs, but with a few breathers, we still got back up pretty quickly. It will be a harder walk in hot weather, or if you have overnight packs. Overnight packs on the scramble would definitely be a challenge!
All in all, this is a really enjoyable hike, with fabulous views, some great forest walking and enough of a challenge to make you feel like you’ve had a good workout, without any bits that felt dangerous on the scramble (which is what I was worried about before doing it).

Getting to the trailhead
The car park for the Golden Staircase is located mid-way along the Narrow Neck Plateau Road. There are a couple of big National Parks sign telling you that this is the trailhead for Ruined Castle.
The road from Cliff Drive in Katoomba along Narrow Neck is gravel, which - although not silky smooth - was suitable for 2 wheel drive cars at time of writing. There is very limited space at the trailhead (perhaps for just a few cars), so if you’re hiking on a weekend and don’t come early, you might need to park quite a bit further down the road.
This post may contain affiliate links, meaning at no additional cost to you, that we will earn a small commission if you click through and decide to make a purchase. This helps towards the costs of running our website. Thanks for your support.


