We’ve had a lot of adventures in the Blue Mountains and I can confidently say this is one of the very best. It’s not exactly a walk, more of a hike, wade, swim kind of adventure and one you’re unlikely to forget. It starts as a straightforward bush walk before you enter the first narrow slot canyon - which if you don’t like water based hikes - is a very worthy trip in its own right.
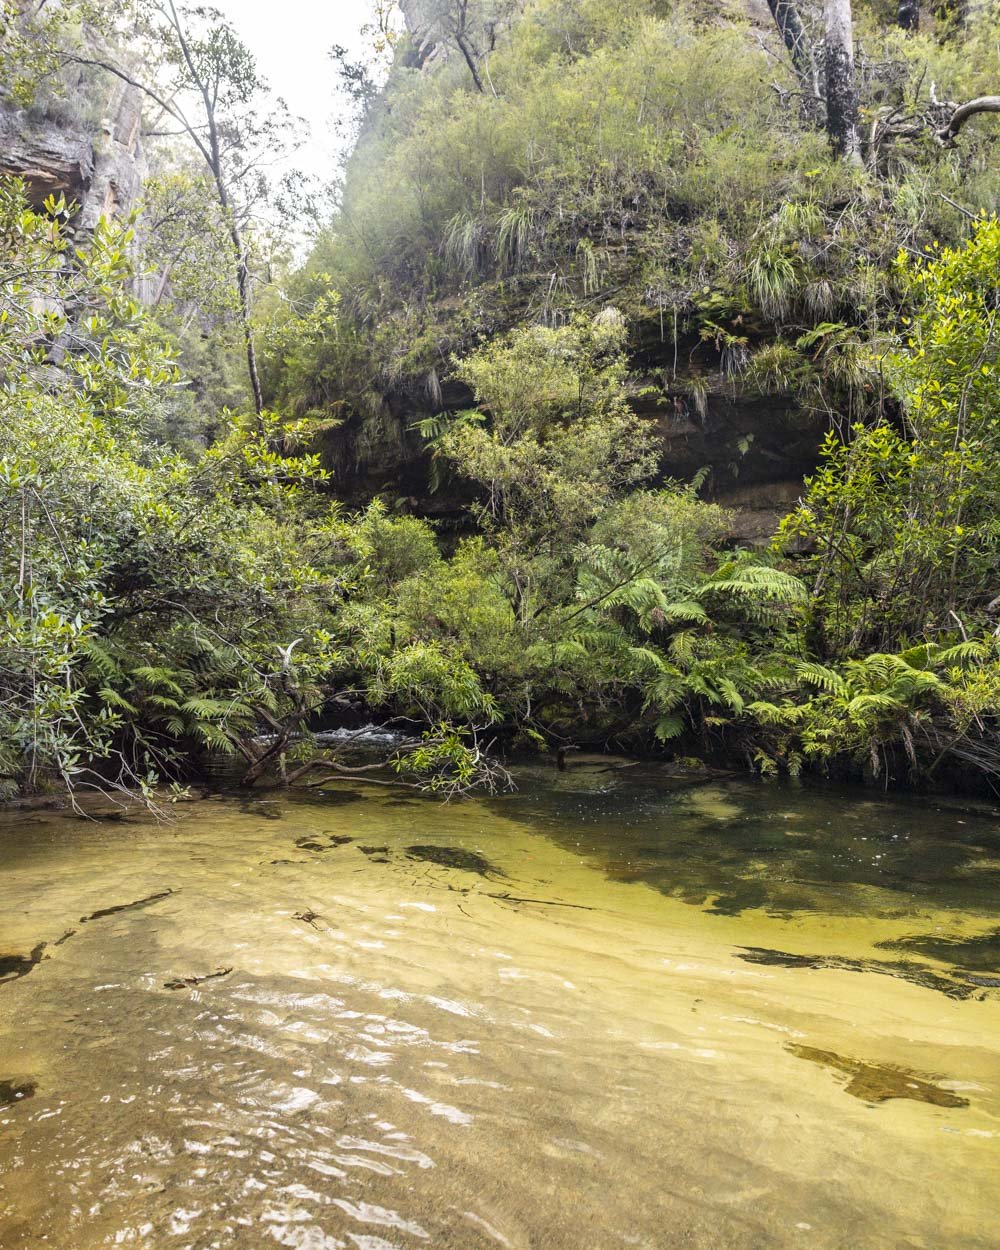
After passing through the first canyon, you’ll begin the wading section and this will take you through some of the most spectacular canyon swims we have ever done; think crystal clear emerald water and huge sculpted rock walls.
I swam through some sections several times just to take in the majesty. We hadn’t even finished the trip before we were already planning our return.
Here’s everything you need to know about the Joes Canyon Loop.

The Joes Canyon Loop Overview
What’s involved
If you only want to do the part of the walk that doesn’t involve swimming, then visiting Joes Canyon is a straightforward bush walk (albeit with a lot of stairs to climb on the way back up) and then a walk through canyon. Water levels in this canyon are generally low.
The majority of the time the water will be ankle height, with short sections at knee height and one very short bit which is between the knee and waist. However, this is at times of normal water levels, don’t venture in after heavy rains.
If you want to complete the longer circuit that takes in more canyons, you will need to wade for approximately 3.4km. There are several mandatory swims, though none were longer than 40ish metres and most of the wading was also quite shallow. There are some dry areas to take a break if needed.

You could take a lilo - which is what Joe did - but the swims were so short that he didn’t use it, though we ended up utilising it as a way of getting our camera gear and clothes across the deep parts.
It was tedious to carry over the sections with debris, so I would not recommend a lilo unless you really don’t like swimming. And even then I think a noodle would be easier to help with swims and much less bulky to carry on the land based sections.
There are a number of long stretches of river with significant debris and bush to get through and this is quite slow at times (although it’s totally worth it). There are also sections with slippery rocks underfoot which require care to traverse.
There is one area where you need to climb up and then down a series of boulders and cascades. No technical moves are required, but you need to be comfortable scrambling over (sometimes) slippery rocks.
The final climb out is all on an excellent track, but it does have many stairs!

Safety info
The most important think to consider is the weather. You want a dry day where no rain is predicted and you don’t want there to have been recent heavy rains or the water levels will be up in the creeks, making the going much tougher. Very high water levels can be dangerous.
Ideally you want to pick a nice sunny day to help keep warm and it doesn’t hurt that the water colour will be especially beautiful in the sunshine.
Most people will be more comfortable using a wetsuit - even in summer - as you will be in some level of water for many hours. The water is cold, though I didn’t find it overly so and it was only 21C (air temperature) the day we visited.
Joe used a wetsuit and found it far more enjoyable than when he didn’t in the Grand Canyon. Personally I didn’t use a wetsuit, but Joe tells me I am cold blooded, so I wouldn’t use me as an example : )
I would recommend leaving plenty of time for this hike because though it’s considered an easy route, it is much slower than your average bushwalk and the scenery is so incredible you will likely stop often.
There will be limited to no phone signal along the route, so we recommending carrying a PLB.

The route
We’re covering the route in the trail notes below, but here’s a quick overview. The trail begins along the Wollangambe entry track and then diverges onto the Joes Canyon Track.
After passing through Joes Canyon you will enter Du Faur Creek. Du Faur Creek will eventually run into Bell Creek before this runs into the Wollangambe. You then exit the Wollangambe River at Horseshoe Bend on a well formed bush track. This will lead you back onto the Wollangambe entry track that you walked in on.
After you begin Joes Canyon nothing is signposted.
The Joes Canyon Loop
The stats
Distance: 9.8km loop
Elevation gain: 320m
Difficulty: Moderate

Starting the trail: to Joes Canyon
I am going to make the first section of track notes quite brief as I covered the hike in detail in our Joes Canyon guide, which you can check out here if you’d like to see more.
You’ll start the hike at the Mount Wilson Fire Station and begin following the Wollangambe entry track.

It’s very well signposted and flat at first before you reach one short hill. From here the trail heads predominantly downhill.
There is one section where it isn’t exactly overgrown, but can be a bit scratchy, however the trail is always clear underfoot and the conditions are good.
You’ll follow for the Wollangambe River until you reach the Joes Canyon turn off at the 2.6km mark, which is signposted, the canyon begins 200m later.


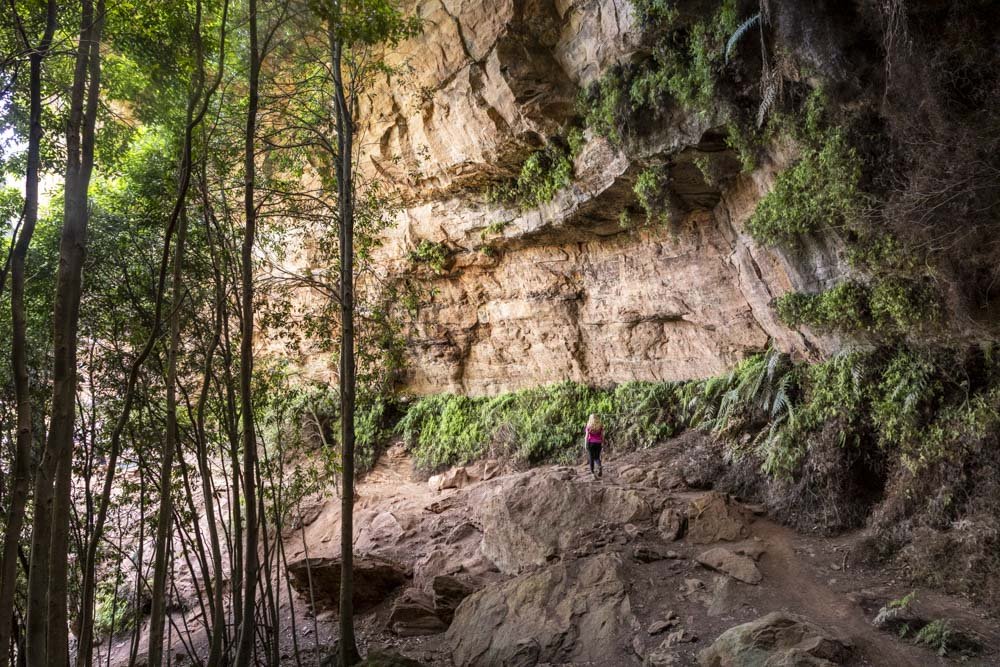
Through Joes Canyon
The walk through Joes Canyon is only 450m, but it’s stunning. The first 300m are all in the creek where the water levels are low but for a few steps that suddenly became close to waist height.
There is a little debris here and there which you can use the river bank to detour around.

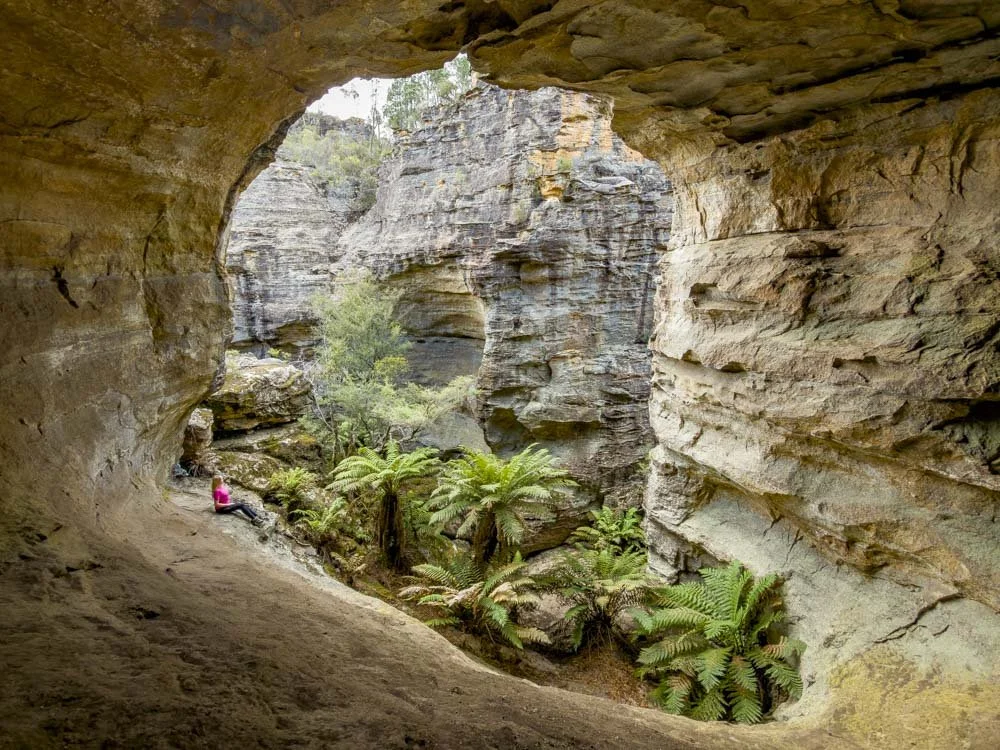
You’ll then enter the narrow slot canyon and this is where it starts to get really beautiful. The narrow canyon walls are so high that even when we walked through on a really sunny day, almost no light entered the slot.
It’s incredibly atmospheric and also very easy to walk through due to the low water levels and lack of obstacles.

The walk through the narrow walls is over all too quickly and you’ll enter a more open section, which suddenly feels like a bushwalk rather than a canyon.
You’re now less than 100m from the end of the canyon and the start of the wade along Du Faur Creek.

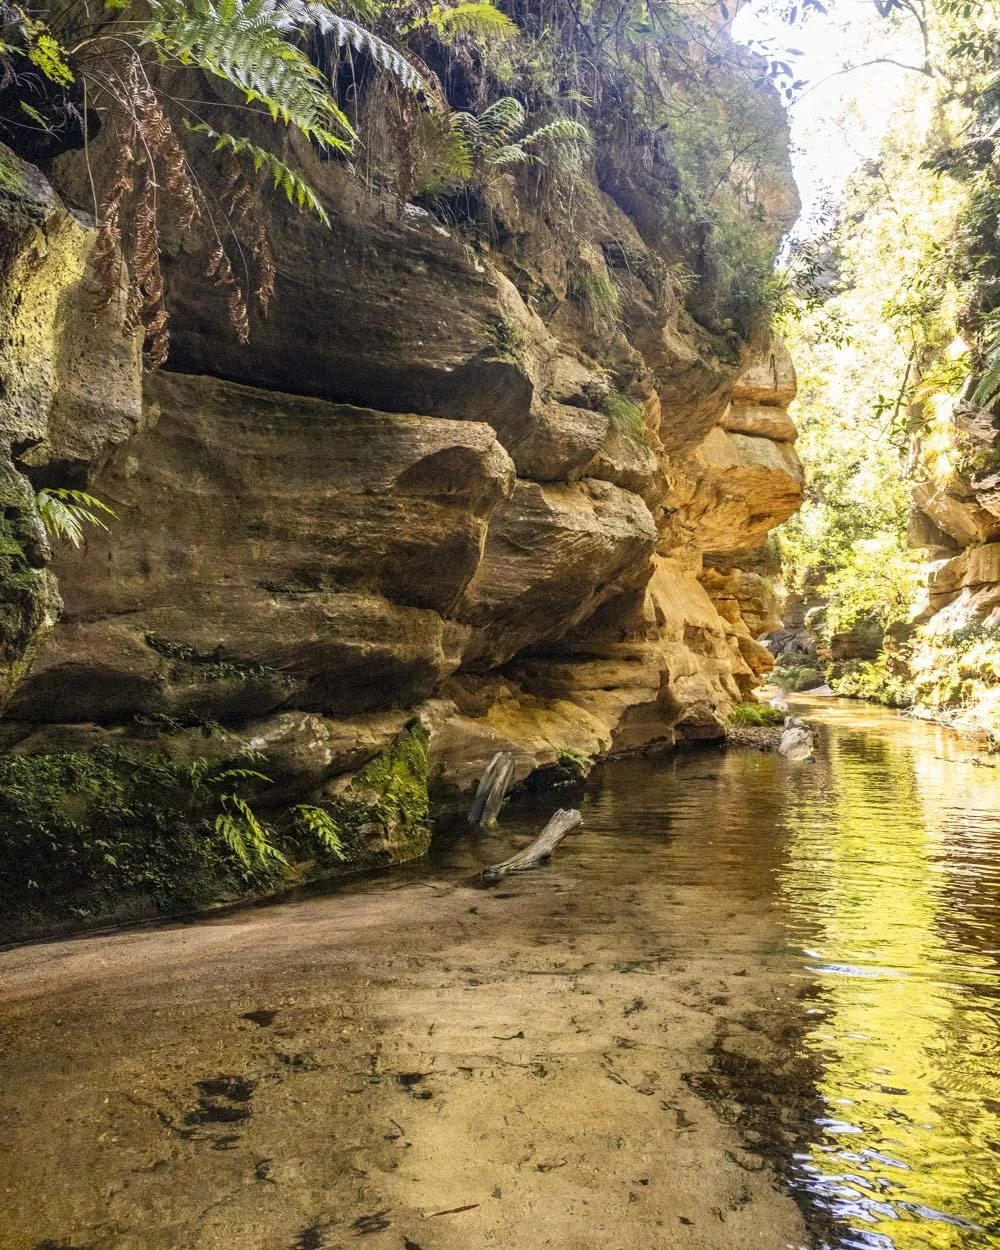
The wade along Du Faur Creek
At the end of Joes Canyon you’ll walk into the shallow water and head right, following the creek downstream. It’s very pretty, though definitely more of a creek walk at this point.
The water is generally shallow, not much more than knee height and the creek bottom is easy to walk on.

Every now and then you will pass through much deeper sections, up to chest height, but nothing that is actually a swim.
You will encounter lots of trees and debris in the water at various points along the creek.
Sometimes it is easier to use paths that run along the river banks, but sometimes the bush is quite thick here too and it’s easier to go through the debris.


Around 600m into the creek walk there is a longer deeper section of water before you reach a swim at the 4km mark and this is the first section of proper canyon since you entered the water.

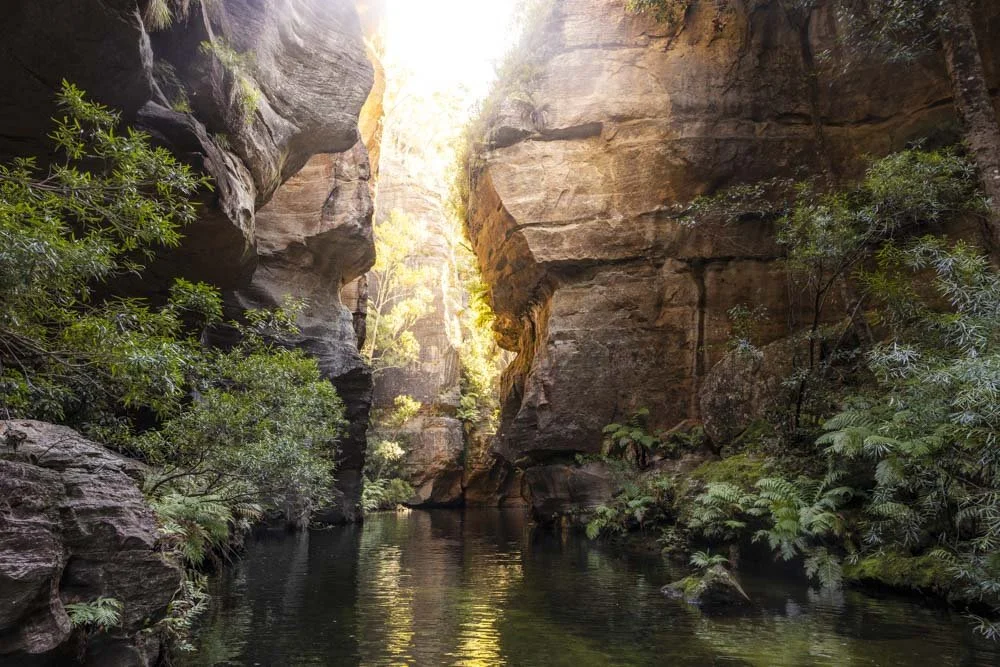
The first canyon swim
Swimming through the canyon was absolutely magical and one of the most spectacular canyons swims I have ever done. It’s almost broken into two sections, though it’s really all the same canyon.
The first pool is smaller, with gorgeous emerald water and high canyon walls.

It was shallow at first, easily wadable, before a short mandatory swim, followed by a shallower section. There’s a log down across the end of this pool and then you cross into the canyon swim that was out of this world.
I mean the first bit is great, but it only gets better.

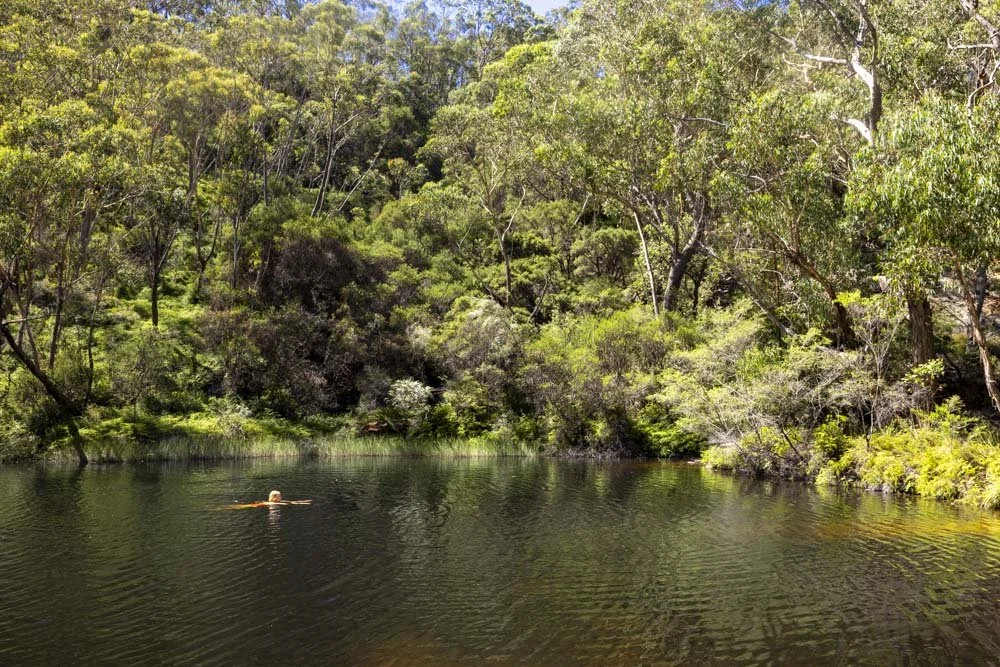
From here you have a fairly long, perhaps 30m swim through a truly sensational canyon. This swim was completely awe inspiring, with the towering canyon walls making you feel tiny.
A trick of the light or maybe a touch of magic meant that the water shone a dazzling blue. It didn’t look real and it’s one of the many reasons if you can pick a very sunny day for this walk, you should.

After the swim it’s back to wading, but you’re still in a beautiful canyon, just with slightly less dramatic walls. Any part of this next bit of the ‘trail’ would be somewhere I would hike to see alone, and the fact it came with so many other incredible spots is a bit mind boggling.
Continuing along the creek
Much of the next section walking through the gorgeous creek is in shallow water, though it is interspersed with deeper parts too, but for us, none were mandatory swims.
Although there is a lot of easy walking you will still encounter some debris in the water.

There are shallow places and small sand banks where you could stop if you wanted, as there are along Bell Creek too.
The next swimming section was 500m after the long canyon swim, but this time it was only very short.

Roughly 650m after the long canyon swim and 4.6km into the trail you’ll reach Bell Creek. You naturally walk into the creek, there are no turns to make, so navigation is easy.
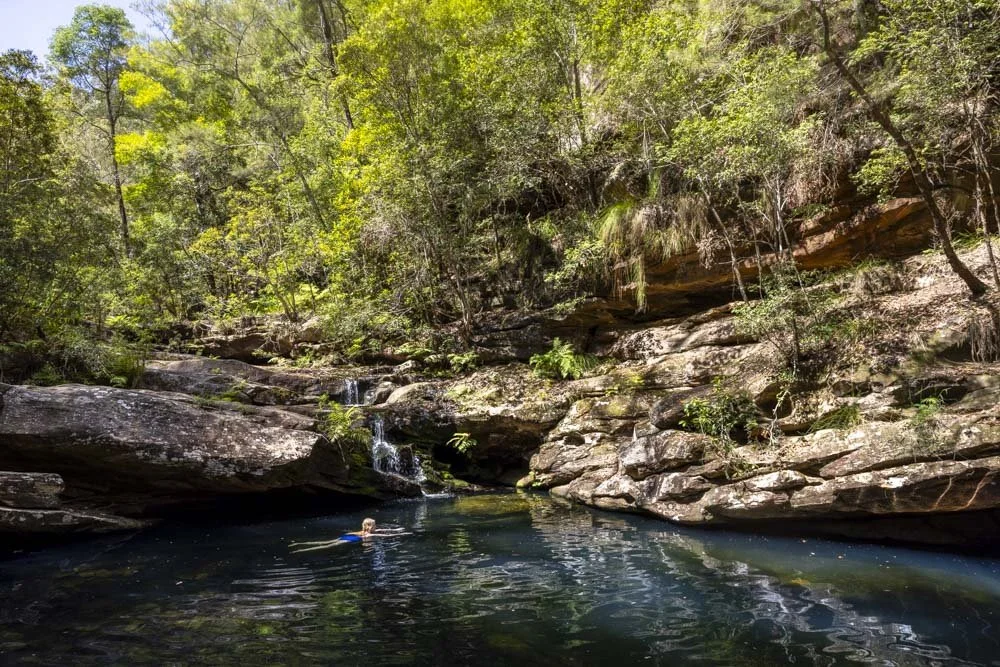
Entering Bell Creek: canyon swims and the boulder section
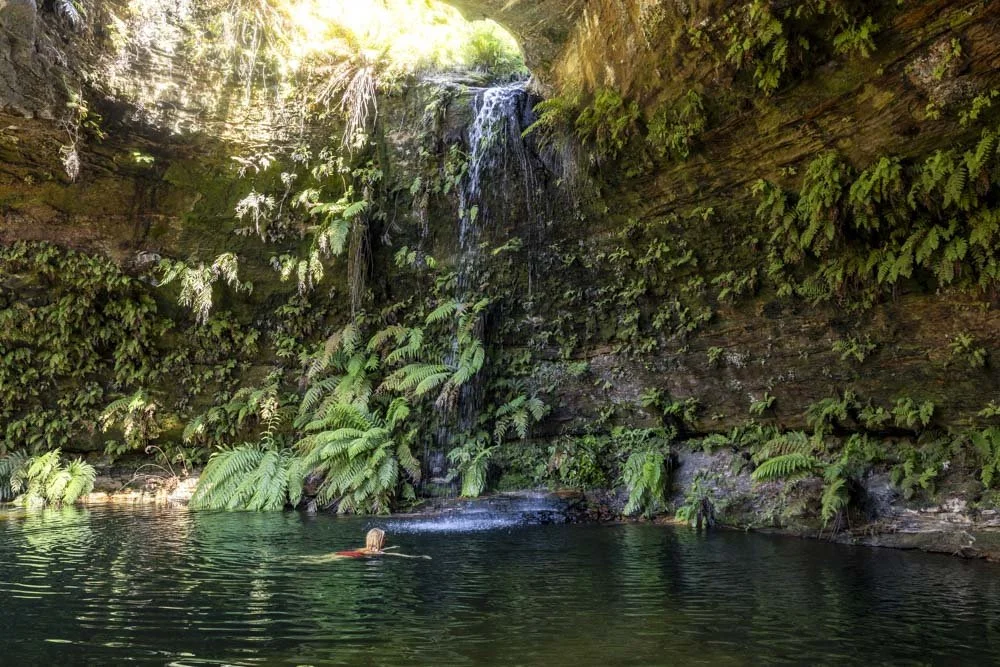
Bell Creek is another exceptionally pretty part of the trail. Your first experience of it will be walking through shallow water under the shadow of gigantic walls. The cliffs had dainty waterfalls cascading down them on our visit.

Although there were a few deeper bits to cross, swimming-wise only a couple of strokes were required (even then you might have avoided them, but I wasn’t trying to) and for the most part it was quite shallow.

After 300m you’ll hear what sounds like a huge waterfall ahead. I’ll be honest, given that we knew very little about this adventure before setting off I felt a bit of trepidation.
I began to wonder if we’d end up having to turn back. As we crossed a little beach under a huge overhang, it got louder and louder, but luckily it was just a particularly powerful set of cascades. Incidentally, this beach would make a great rest/lunch stop.

The cascades are set amongst quite a large section of boulders. After having a poke around we felt the left side of the boulders was easiest to cross.
The first section was covered in branches and tree fall, but it wasn’t too bad as the boulders were pretty small at this point.

However, soon the boulders became bigger and had little pools between them, which made it trickier.
There are no technical moves required here, but you do have to clamber up and over a lot of rocks and small, but quite forceful cascades (though we were told the creeks were a little ‘up’ when we did this walk).

After some time on the left side of the boulders we crossed to the right, as the easiest entry point to the next pool is on the right.
Our watch measured the section between the beach lunch spot and this set of boulders as 350m, though it is never accurate in this kind of environment and it’s likely shorter.

After the boulders you come to the next canyon swim and it’s a beauty. It’s very short though, so if you don’t like swimming it’s just a fraction of the length of the first one.
After this you come to more boulders, but a much less significant section.

Heading for the Wollangambe and Horseshoe Bend
Stunning as Bell Creek is, it does have its tedious sections and after two sets of boulders you’ll now have to make your way through a series of debris strewn cascades. And unfortunately the rocks along this part of the creek are pretty slippery.
It requires a bit of trial and error and was not overly enjoyable, especially with a lot of water in the cascades.
I wouldn’t say it’s hard as such, but I would say it’s slow and tedious. There is another swim along this section, but again it’s a short easy one.


As you make your way along the cascade section you can sometimes use the river bank to bypass them, but it is also quite overgrown, so whilst it’s easier, it’s still a bit of a bush bash.
I would estimate (but again the watch is not accurate on this kind of terrain) that this debris strewn cascade section lasts about 400m.
There’s some bad tree fall at around the 6km mark and then you’ll bear right into the Wollangambe River. After a small amount of debris you’ll reach the most blissful section of unobstructed easy walking, through relatively shallow water with a sandy bottom.
After all that clambering it was an absolute delight and I could completely relax and take in the tremendous scenery again. You could hear the birds, insects and the soothing sound of much gentler running water. I didn’t want it to end.
Unfortunately it only lasted for around 250 glorious metres before we reached Horseshoe Bend and our exit track.

The exit track leads into the bush behind the big log across the water
At the exit track there’s a large sandy beach with a log to sit on and stunning scenery. It has such a serene feel and was a hard spot to leave.


The exit track
There’s a large tree down beside the exit track, the path is on the right and not immediately obvious. We walked along the log and then climbed onto the track, but you could walk through the water underneath it and step up onto the track.
Once you’re on the path, it’s a good trail all the way back the car park. It heads uphill on a mix of dirt track and stairs in a pretty patch of forest.


After 200m, at the junction, you head right. There’s a short rocky path uphill before the trail flattens.
Around 150m after the junction you can turn off the path onto the rock platform on the right. It offers a fabulous view over the gum tree studded pagodas. It’s only a 10 second detour and well worth it.

The next 850m are a flat leisurely stroll before you reach the junction where you turned off for Joe’s Canyon. After this point much of the track back to the fire station is uphill on a mix of stairs and dirt path. It is a little steep in places and there aren’t many breaks in the climb, but it didn’t feel too challenging - maybe as we were on a high after such a great walk!
You’ll reach the car park approximately 3.6km after you left the river.
Keep them wild
Please remember to take all rubbish with you and keep these places wild and pristine - as with anywhere in the outdoors. It’s important to leave them exactly as you found them so they will remain beautiful for generations to come.
Litter tends to breed litter, so if you do spot any and are able to pick it up and dispose of it outside the national park, it will go a long way to keeping the area clean.
What to pack for Joe’s Canyon
Dry Bag
Firstly, we’d recommend a dry bag. We brought a 10 litre one, and it wasn’t really big enough, so we had to choose what to keep dry and what could get wet. Ideally, you’d just put everything in the dry bag and not sacrifice anything! A 20 litre bag would have been better and there’s plenty of options on Amazon you can choose from. Alternatively, you can hire one to take with you.
Wetsuit
Most people will be more comfortable in a wetsuit for this trip. Joe chose to hire one for the day from the Blue Mountains Adventure Company, which cost $40 for 24 hours.
PLB
There is little to no phone signal around Joe’s Canyon, so it’s advisable to carry a PLB incase of emergency. We carry a GME personal locator beacon, which has the added benefit of working globally. You can check this one and others on Amazon. Alternatively, there are places where you can hire a PLB for the day.
Dry clothes
After spending all day in wet gear, you’ll want to bring some dry clothes for the walk out. You’ll want to keep them in a dry bag for the trip.
A good amount of water and food
This walk will likely take longer than you expect due to the terrain and the incredible scenery. Bring more food and water than you think you’ll need.
Getting to the trailhead for Joes Canyon
The walk to Joes Canyon begins at the Wollangambe parking area beside the Fire Station in Mount Wilson. You’ll find plenty of free parking in the designated car park. It’s around 40km and a 40 minute drive from Katoomba, 32km and a 30 minute drive from Bilpin and 122km and a 2 hour drive from Sydney.
There is a public toilet at the fire station, but nowhere else along the trail, please plan accordingly.
This post may contain affiliate links, meaning at no additional cost to you, that we will earn a small commission if you click through and decide to make a purchase. This helps towards the costs of running our website. Thanks for your support.